How To: Bring Apple's 'Live Photos' Feature to Your Android Device
If Android is all about options, then iOS is all about new features. Every year without fail, Apple announces a cool software component that brings something new to the table, and this year was no different.The headlining feature to go along with the iPhone 6s is called "Live Photos," which is a camera mode that captures the few seconds of video that occurred before and after you hit the shutter button, and displays them kind of like a GIF. This goes back to something else that Apple is really good at: re-branding existing technology (GIFs) to make them seem revolutionary (Live Photos).But coming back to Android's strengths, of course, we already have some options to emulate this new feature. For the bulk of the article below, I'll cover the process with the app we liked the most—then at the end of the article, I'll provide links to some additional Android apps that come with "Live Photos" functionality.Don't Miss: The Best Free Camera Apps for Android Please enable JavaScript to watch this video.
Step 1: Install Camera MXOur favorite app that brings the iPhone's Live Photos feature to Android is called Camera MX, and it's availble for free on the Google Play Store. To begin, search the app by name and get it installed, or head directly to the install page at the following link.Install Camera MX for free from the Google Play Store
Step 2: Take a 'Live Shot'Camera MX has a shooting mode called "Live Shot" that behaves exactly like the Live Photos mode on iPhones, which means that the animated portion of your photo is recorded a few seconds before you tap the shutter button.So to use the feature, make sure to put Camera MX into "Live Shot" mode by tapping the spiral-shaped icon on the top or left side of your screen. From here, hold your device still for a few seconds and frame up your shot, then tap the shutter button to capture the scene.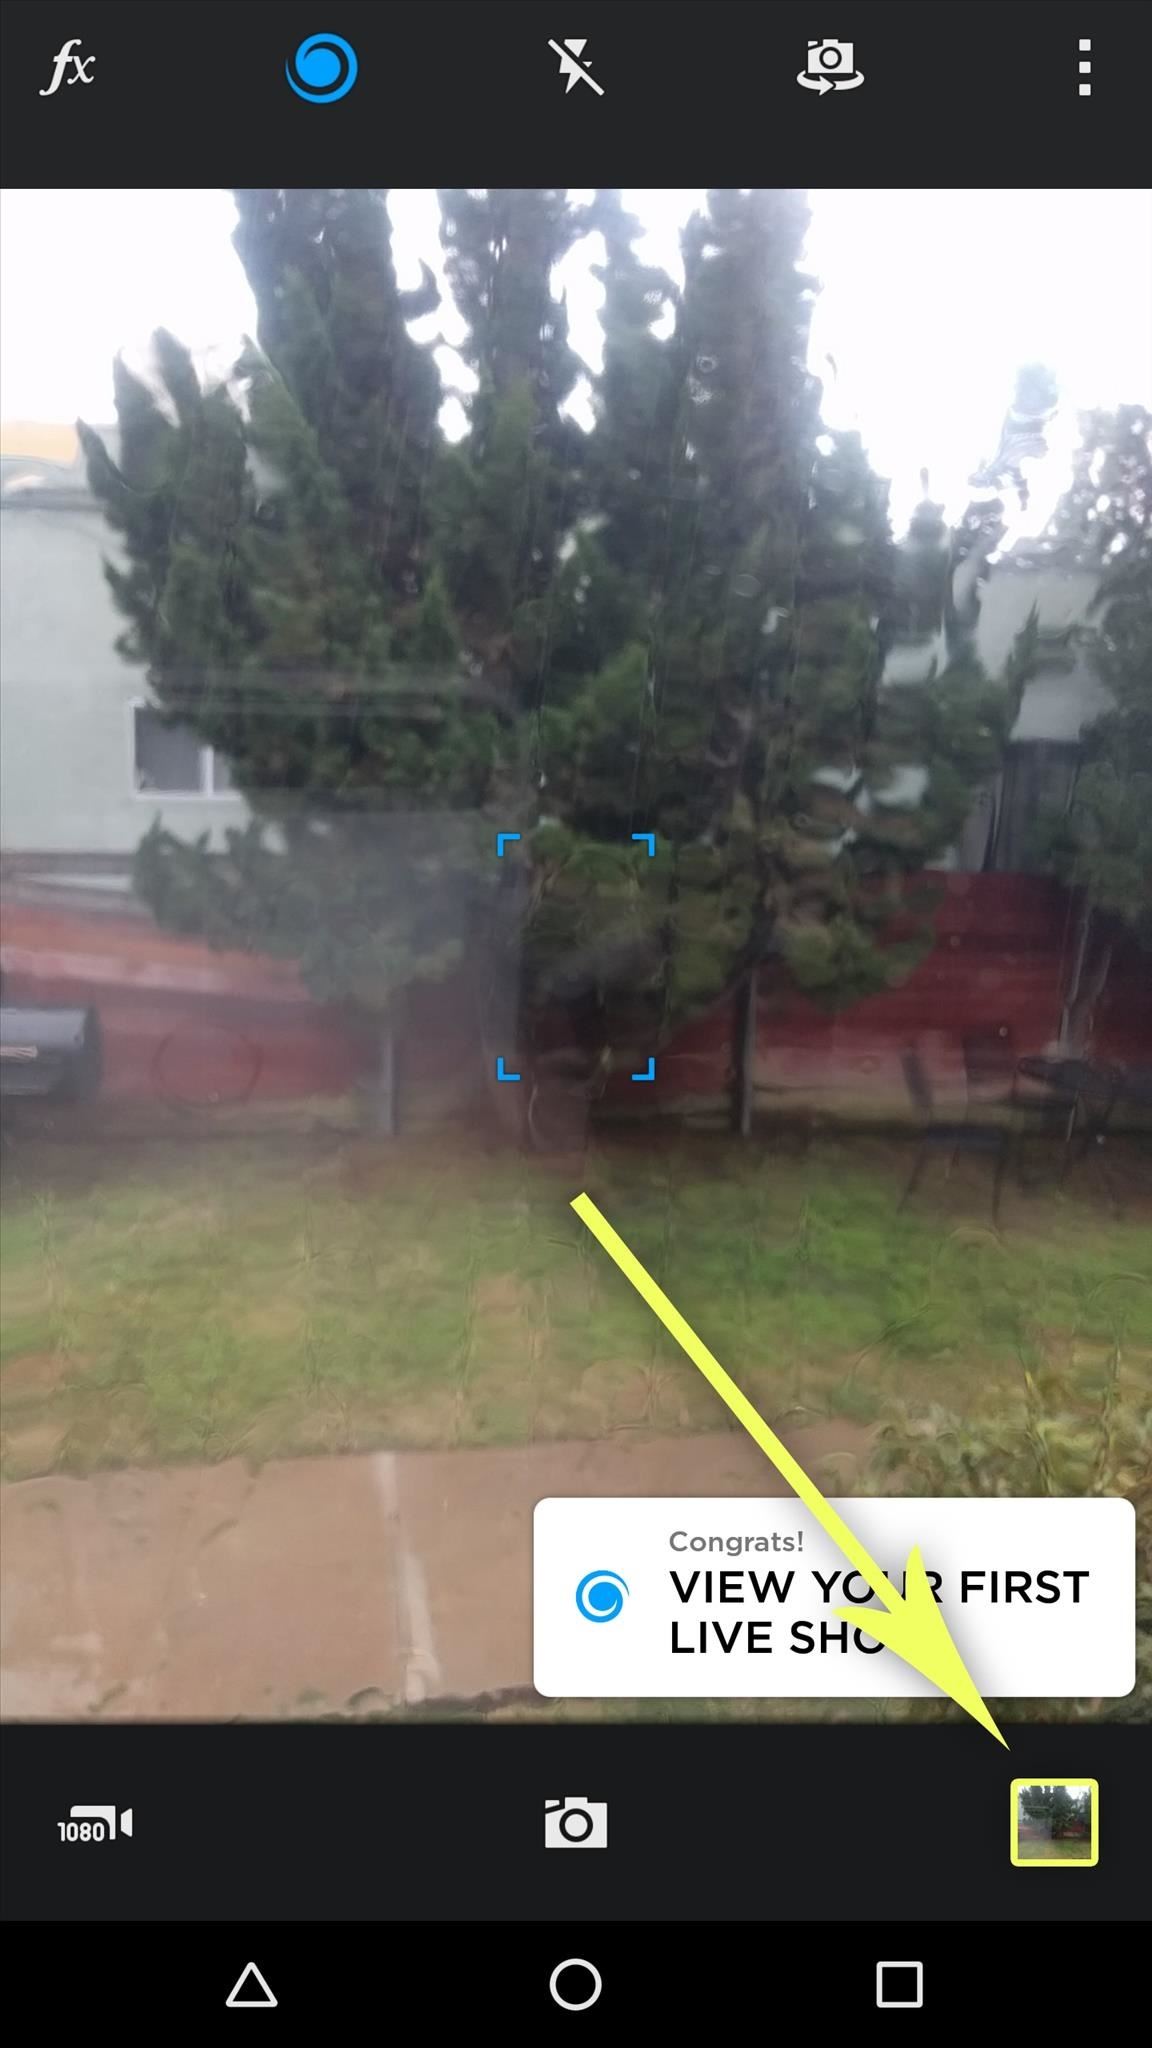
Step 3: View & Edit Your 'Live Shot'After a few seconds of processing, your Live Shot will be ready to view, so tap the gallery thumbnail in the corner to check it out. From here, you'll see a still photo, but similar to Apple's Live Photos, the image becomes animated when you press and hold the screen. If you'd like to change the beginning or end of your Live Photo-like looping video, tap the edit button at the top of the screen, then choose "Edit Live Shot." From here, you can use the sliders to choose where your video starts and finishes, but make sure to hit the "Save" button when you're done.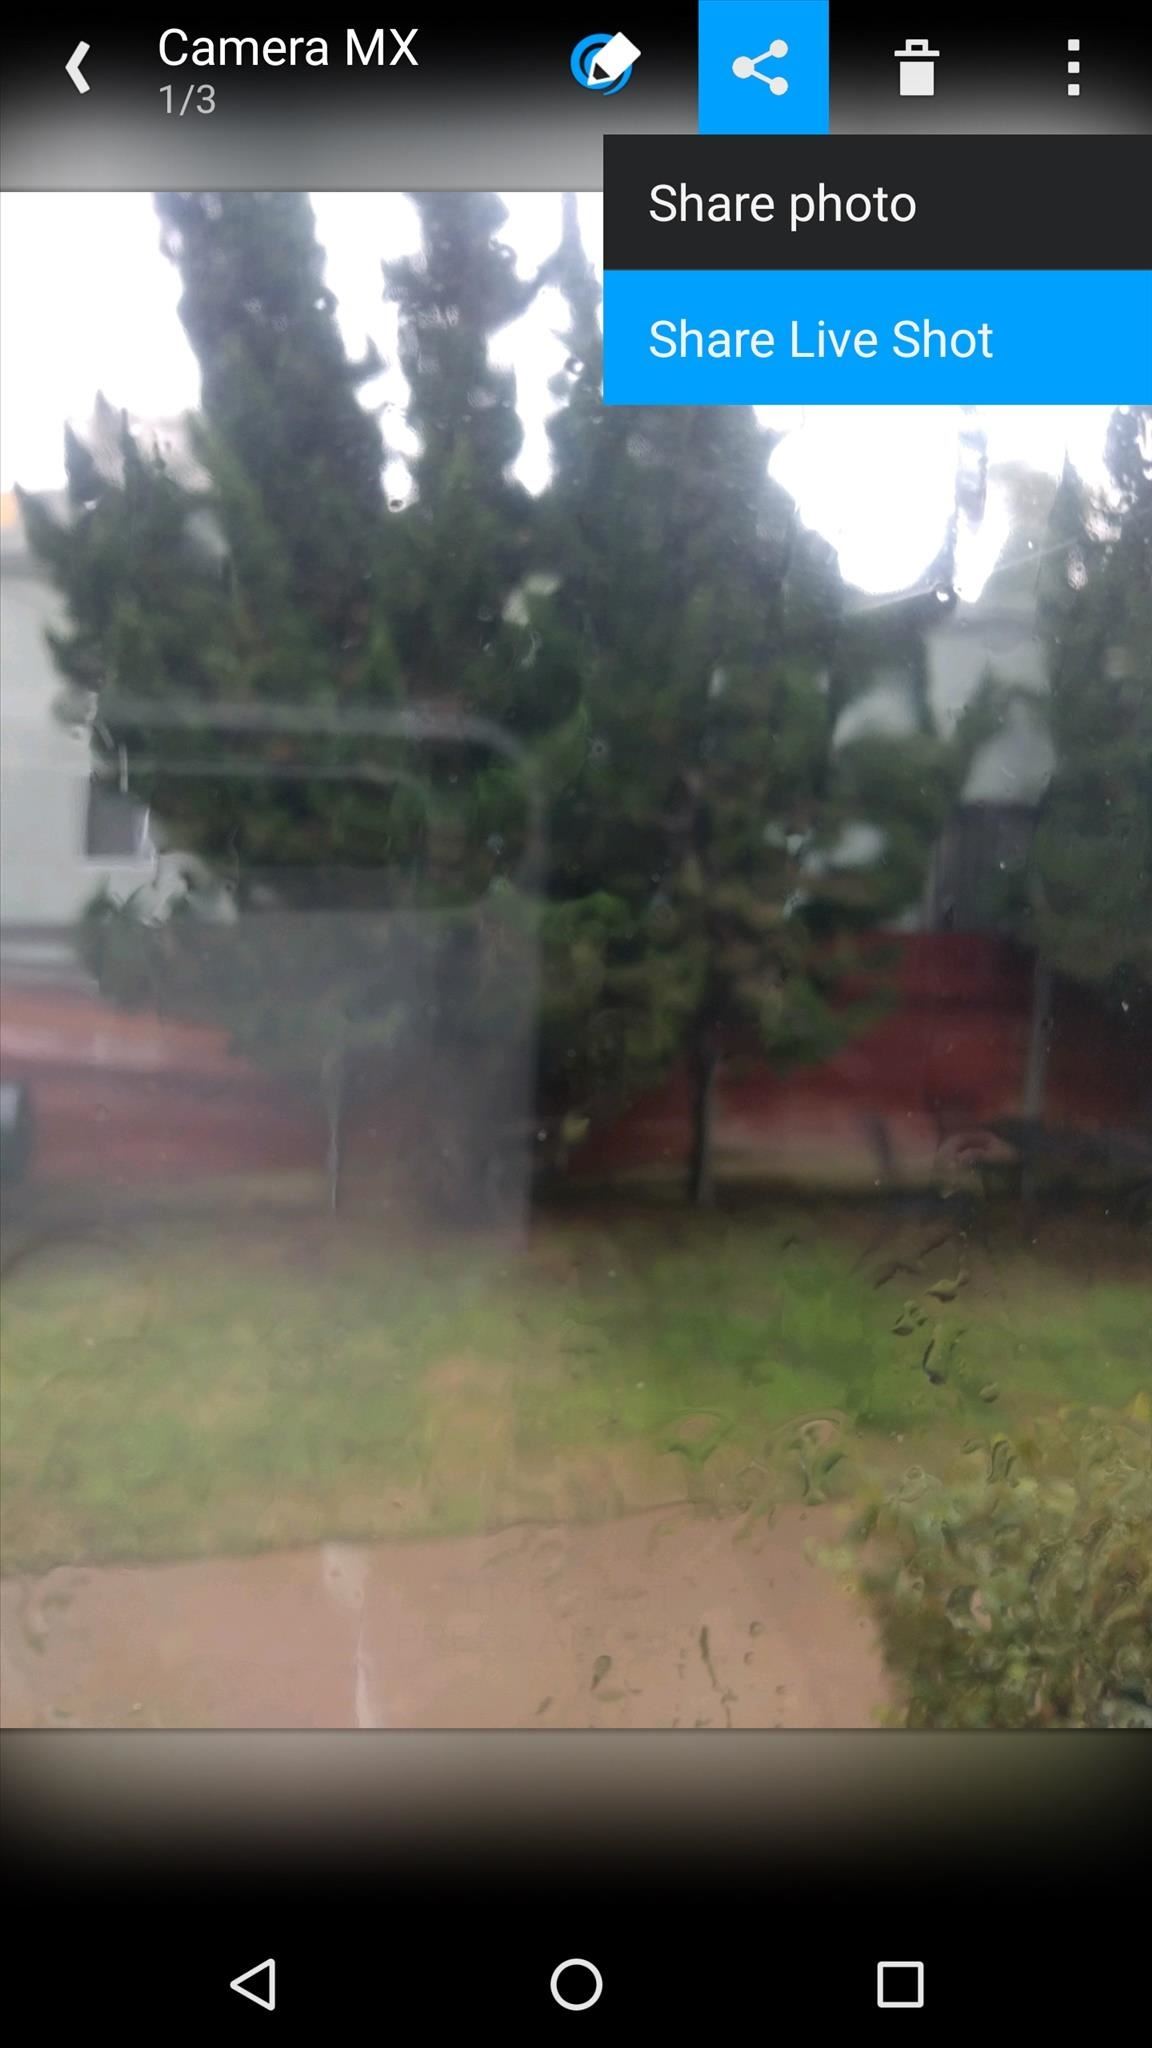
Step 4: Share Your 'Live Shot'When you're ready to show your creations to other people, tap the "Share" button at the top of the screen, then choose "Share Live Shot." From here, you'll see Android's share menu, where you can select an app or service to send the file to. The video is saved as a common MP4, which means it's compatible with most image-sharing sites and social media services.
Other Apps That Emulate Apple's 'Live Photos' FeatureIf you'd like to try a different app for emulating Apple's Live Photos feature, you've definitely got some options. The following free apps have a similar shooting mode and can easily be used to make shareable moving pictures:Gif Me! Camera: Records video clips as animated GIFs Graphica Live Photo Maker: Animated GIF camera & editing app Have you uploaded any of your "Live Photos" already? If so, post a link in the comment section below, or drop us a line on Android Hacks' Facebook or Twitter, or on Gadget Hacks' Facebook, Google+, or Twitter.
These options can be helpful, but they're no substitute for truly taming the clutter. Organize Your Files and Shortcuts Into Folders. Consider using folders to keep your desktop organized. To create a folder, right-click the desktop, select New > Folder, and give the folder a name. Drag and drop items from your desktop into the folder.
What does a cluttered desktop mean? - Freewaregenius.com
How to turn off (or turn on) landscape mode on the iPhone 6/6s Plus and iPhone 7 Plus home screen With a big display comes a home screen that can switch modes.
Get the iPhone 6 Plus' Resolution & Home Screen Landscape
In this video, I show you how to turn your old pc into the ultimate Retro gaming machine using Recalbox running from a USB Stick. Play 1000's of your favorite retro games! Buy a pc
Convert Your Classic Game Boy into a Powerhouse - WonderHowTo
And that's how IP ratings are formed. To recap: IP67 means the unit can be dropped into a body of water up to a meter deep for half an hour, while IP68 guarantees protection in water up to 1.5m
Google Pixel 3a XL vs Pixel 3 XL: notch a lot of differences
Unfortunately, the Hangouts application doesn't have too many users at the moment and things will get worse, because the company decided to remove the SMS feature from it. Hangouts version 18 is currently rolling out, but, for now, it doesn't come with any functional changes. However, the new version of the application comes with a code
Improve Picture Quality for MMS Messages in Hangouts « HTC
How To: Reduce noise on Twitter with DM opt out How To: Block apps and people from interacting with you on Facebook How To: Send a large file over the Internet with YouSendIt How To: Manage pictures, videos, movies, music and TV in Windows Vista Media Center
How To: Boost Performance & Battery Life on Your Galaxy S5 with These "Build.prop" Hacks How To: Enable Free WiFi Tethering on Android Marshmallow How To: Make a Cheap & Easy Prop Skull News: Android's Best Build.Prop Tweaks for Better Speed, Battery Life, & Customization
How to Enable the Built-in Screen Recorder on Android 10
Grouped Notifications in iOS 12 Makes Browsing Alerts on Your iPhone Way Less Annoying By admin On 8 giugno 2018 · Apple's linear Notification Center has been scattershot at best since iOS 9 when we could group notifications by app.
How to Group iPhone Notifications - tech-recipes.com
How to Change the font on your iPhone - Gadget Hacks
Android 4.0 has not been released for the Nexus One, but you can still install with a tutorial we will be covering later on. For now, let's take a look at how you can get HTC Sense 3.5 (from HTC Desire, HTC Sensation etc.) with Android 2.3.5 on your Nexus One. Disclaimer: We are not to be held responsible if you damage or brick your device
How to Install HTC's BlinkFeed Launcher on Any Android Device
How To: Use Any App You Want in Multi Window View on Your Samsung Galaxy Note 3 How To: Make Any App Work in Split-Screen on Your Galaxy Note 9 How To: Enable Multi-Window View for Every Single App on Your Samsung Galaxy S4 How To: 7 Features That Make the Samsung Galaxy Note 4 Great
Find out how to Make Any App Work in Break up-Display screen
0 comments:
Post a Comment