How To: Create & Manage Spark Email Templates & Canned Responses
If you find yourself emailing the same email over and over again with just a few changes such as new addressees, or if you're constantly replying to messages with the same response, typing it out every time is, well, a waste of time. Spark, a third-party email client for mobile devices, takes all the work out of this — no matter which email account you need it for.Spark's feature is akin to Gmail's and other email services' canned responses, which let you create custom email templates you can select from whether you're sending an email to someone first or just replying. While most services, including Gmail and Apple Mail, limit templates to desktop and web apps, Spark's is available right inside its mobile app and works for Gmail, Apple Mail, Yahoo, and so on.To start, make sure you're running the latest version of Spark on your device. While Spark is available for both iOS and Android, templates are only available for iPhones right now. Template supported started in Spark version 2.1 for iOS, but it works slightly different now on newer versions.Don't Miss: How to Add Hyperlinks to Your Emails in Spark
Step 1: Access the Template EditorThere are two ways to start a template. First, in any draft, tap the template icon in the menu bar, then tap the + (plus) button in the top right of the Templates page. All connected accounts and teams with template folders will appear. If you aren't sure which folder to save your template to, start with "My templates." Once you choose a folder, the template editor will launch.The second way to reach this template editor is through the in-app settings. Whenever you're viewing your inbox or another folder such as sent emails, either tap the hamburger menu icon in the top left or swipe right from the left side, then tap "Settings." Next, tap "Templates," and you'll find yourself at the same folder selection screen as in the first method. Tap the + (plus), then choose your folder.You cannot make custom template folders, so use "My templates" for personal ones and a team folder for templates you'd like other team members to be able to access. Finding the template editor via a draft (left) and the settings (right).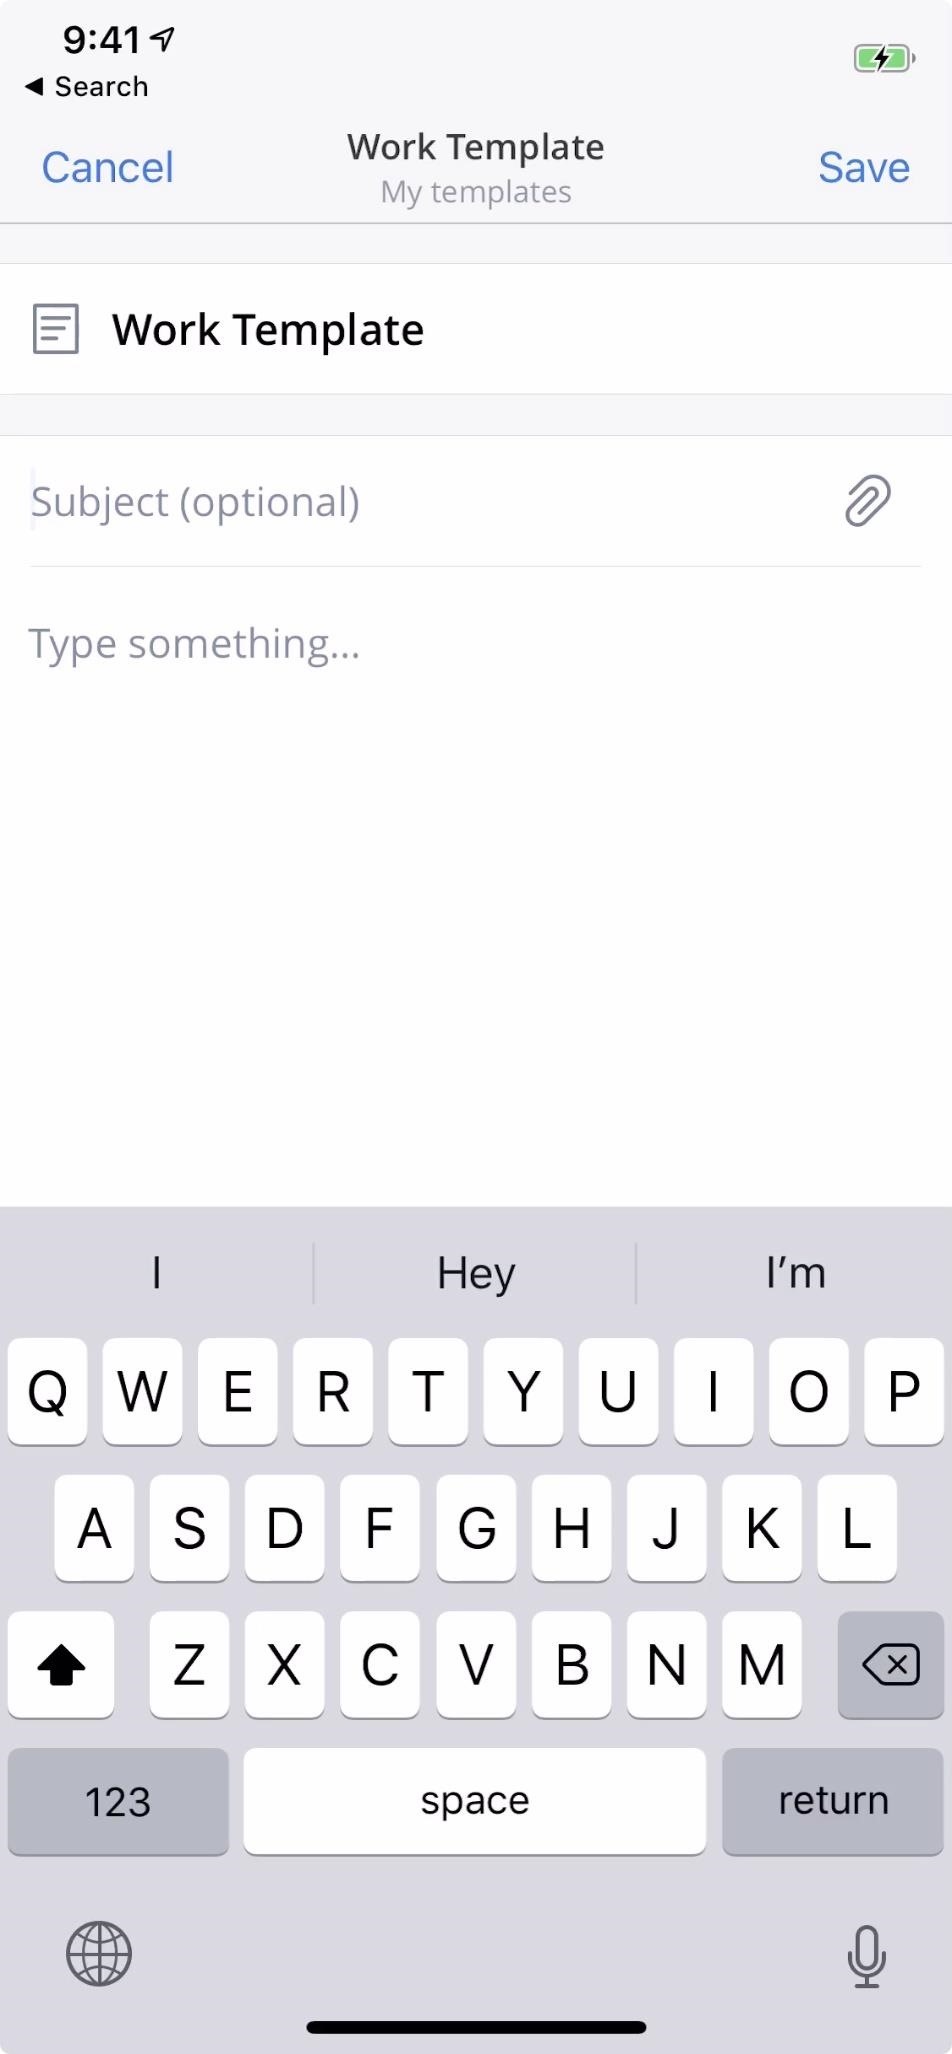
Step 2: Name & Draft Your TemplateFirst, add a name for the custom template in the "Name your template" field up top. You can change this at any time if needed. This title will not be shown to any recipients as is only for you or your team to help locate the template needed.If you know how to write an email, you know how to create a template. You save both a subject and body with your template, which is just like writing an ordinary message. You can add attachments with the paperclip icon, and you'll even see the same rich text formatting tools presented in the menu bar above the keyboard. The one thing you won't find here, however, is the signature box, which you can only add after selecting your template in a draft.For those of you who craft emails with HTML, you can simply insert the HTML code right into the body of the email and Spark will recognize it as such.
Step 3: Add Auto-Fillers (If Necessary)Auto-fillers in Spark templates is exactly what it sounds like: placeholders for information that will be filled out correctly later. In this case, they refer to either your name or the name of the recipient.When applying a template with either of these enabled, the auto-filler for your name will be automatically filled in based on your contact info in the "From:" field. Likewise, the "To:" field will dictate what appears in the recipient auto-filler labels, which could either be a person's name or a company name. To use an auto-filler, line up the cursor where you'd like the auto-filler to go, then tap the blue "Abc" icon in the formatting toolbar. Next, you'll be presented with six naming options:My first name My last name My full name Recipient's first name Recipient's last name Recipient's full name Each is self-explanatory. You can apply more than one of these options to each template, as well as duplicates of each item, so feel free to repeat or use different versions as you see fit. Note: the recipient options will only auto-fill later if you have that user's name saved to your contacts, and it will also only work with one-on-one email exchanges. Otherwise, the space where each recipient auto-filler is will simply be turned to a placeholder that you will need to change manually.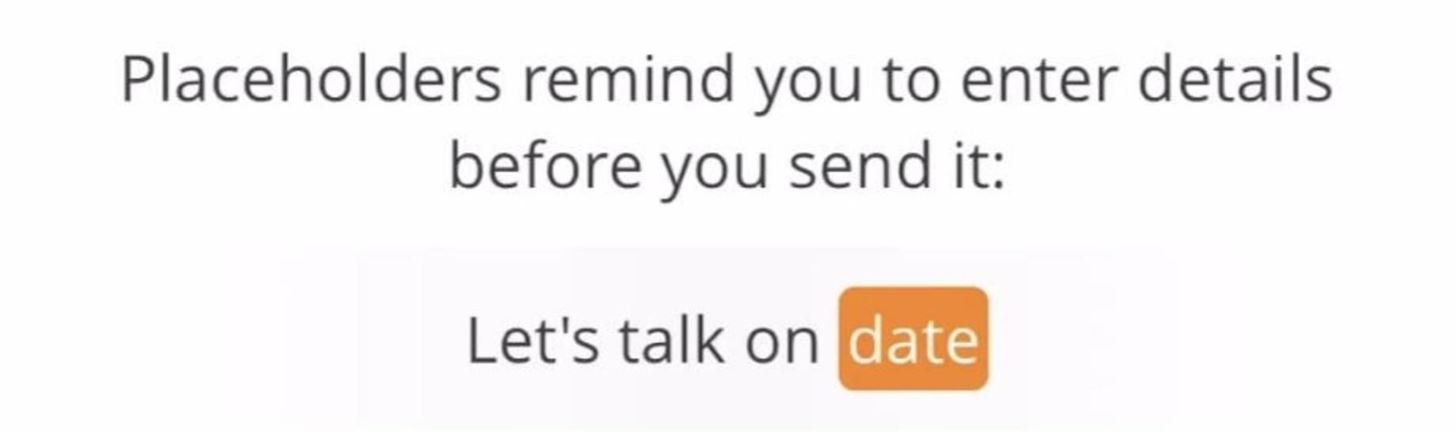
Step 4: Add Placeholders (If Necessary)Placeholders act as an easily identifiable space for you to replace text with after applying the template. That way, you don't accidentally send an email with "project name here" or "Q3 stats" when you gloss over your note to yourself.Using placeholders works similar to auto-fillers. In fact, in earlier versions of Spark, everything was just called "placeholders" with auto-fillers being called "custom placeholders" in the placeholders menu. Now, there is some separation, but it works the same way. Line up where you'd like the placeholder to go in your text, then tap the orange "Abc" icon in the formatting toolbar. An orange "Placeholder" will appear in your template where you indicated. Begin typing, and whatever you type will be the placeholder. When finished, you can simply tap anywhere else in your template, and the placeholder will turn a solid orange with your text inside.
Step 5: Save Your TemplateWhen you're finished working on your template, tap "Save." You'll return to the templates folder you chose to save your template to. If you'd like to make adjustments, just tap on your template from the list, and do so accordingly. On subsequent edits, you will not have to hit "Save" to save it — just hit the back button and all edits will be saved automatically.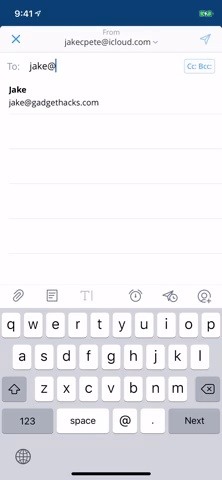
Step 6: Apply a Template to a DraftYou'll find using templates to be quite simple. First, start from a blank draft, either as a new email or a reply, then make sure to add the recipient if using a recipient auto-filler. This is very important because auto-fillers cannot be auto-changed once a template is added, so the recipient needs to be added beforehand so that the template can read the "To:" field. If you accidentally forget to do this, you need to start a new draft or change them out manually.Likewise, if you have any auto-fillers for your name in the template, make sure you change the "From:" field to whatever email address you want to use before applying the template. It needs to read it first when applied, and it can't be auto-changed later. This will not be an issue if you only have one email account in Spark or if your name is the same for each email account.Next, tap the template icon in the menu bar, then choose your template from the pop-up window. If you don't see it, try using the search feature to locate it. Once you do, simply tap your template, and voilà — your empty draft is now your email template, complete with auto-fillers and placeholders alike.If you have any placeholders, you can add updated text easily. Tap on the placeholder, and ensure it turns dark orange. Next, begin typing. The orange will disappear, leaving you to type whatever it is you need to. For signatures, you can add or change them at the bottom of the email draft before or after you apply the template. It doesn't matter.
Step 7: Manage Your TemplatesAll of the templates available to you can be found on the Templates page, found via Settings –> Templates. Here, you can view all of the templates you created as well as any others created for your team if any. To edit a template, tap on it and make the necessary adjustments, and hit the back button to save it.To delete a template, from the Templates view, you can long-left-swipe on it to delete automatically or small-left-swipe to reveal the "Delete" button. You can also delete a template by tapping on it, then selecting the ellipsis (•••) icon in the top right; Choose "Delete" on the action sheet.Also available in the ellipsis (•••) menu for each template is the option to "Copy," which will then bring up another action sheet asking which folder you'd like to make a copy in, and "Move," which will also bring up another action sheet asking which folder you want to change it to. Don't Miss: How to Schedule Emails in Spark So You Don't Forget to Send Them LaterFollow Gadget Hacks on Pinterest, Reddit, Twitter, YouTube, and Flipboard Sign up for Gadget Hacks' daily newsletter or weekly Android and iOS updates Follow WonderHowTo on Facebook, Twitter, Pinterest, and Flipboard
Cover image, screenshots, and GIFs by Jake Peterson/Gadget Hacks
How To: Craving a Mario Kart Gaming Experience on Your iPhone? Give This Soft Launched Game a Try By Amboy Manalo; iOS & iPhone; Gaming; Space Ape has soft-launched Go Race: Super Karts, giving you a fresh take on mobile racing games by blending in elements found within the classic Mario Kart series and RPGs for some seriously addicting gameplay.
Super Mario Run 101: How to Conserve Battery Life While
QR Code is a 2D barcode symbology capable of encoding all types of data, such as numeric, alphabetic characters, Kanji, binary, text, url etc. To build a qr code generator in Microsoft Visual Studio, we can use a qr code generator .NET DLL by Avapose.com and follow these steps:
iOS 11.3.1 Finally Fixed the QR Code-Scanning Vulnerability
In today's video, we show you how to completely reformat your Mac and set it back to factory settings, all without the need for a recovery disk or drive. Check out the video above to see how!
formatting - How to format my mac without the installation
In this tutorial, I'll be showing you how to automatically "hibernate" problematic battery-hogging apps—even without root! A recent update to the app "Greenify" allows for automatic hibernation
Stop Android apps running in the background [ How To ]
It must be over 150 MB for your device. The Android system cannot work properly if the internal device storage is below 150 MB. If under 150 MB, use the following tips to clear more storage: Delete unnecessary text messages (SMS) and picture messages (MMS). Transfer pictures and media to a computer to remove them from the phone memory.
Clear the history and cookies from Safari on your iPhone
If you feel like you're on the wrong track with what matters most to you, here are nine warning signs to look for, and tips to get you back on track: 1. All the decisions you've made someone else made for you. There are people who live their entire lives on the default settings, never realizing they can customize everything.
Going Online with Your Android-Enabled Phone | Getting
Replace Android's Voice Dialer with Google Now for Better
Gauss Guns Launch Steel Balls with Magnets! How is a Gauss Gun made? What is needed to make one of your own? How and why does it work? In this article, we study Gauss Guns and analyze some details of their construction. What is a Gauss Gun? The core of a gauss gun consists of a single neodymium magnet with several steel balls stuck to it.
Build a Gauss Rifle - YouTube
You can compose a new email message and send a text, picture, or video message to a wireless number. Text message - Compose a new email and enter the recipient's 10-digit wireless number, followed by @txt.att.net. For example, 5551234567@txt.att.net.
How to Copy a Text Message to Email | It Still Works
But if you are still set on your ways and want to know how to close apps on the iPhone X, read below. How to Close Apps on iPhone X in iOS 11 Step 1: Swipe Up and Hold. Bring up the App Switcher on the iPhone X by swiping up from the bottom of the screen, holding your finger on the screen for a second and then removing it. Step 2: Tap and Hold
How to Force Close All Apps at the Same Time on iPhone
Awesome tips to increase traffic traffic on the website. I was looking for some effective tips of link building. I started off with new SEO project and I was a little confused about where to start. Dealing with dead links of wikipedia and finding authoritative sites I found the best. I hope it will work for me. Thanks,
$610 17 Min Free Traffic
AD
ultimatetrafficmonster.com
Report Ad
Ultimate Traffic Monster is finally live! (use discount code utm123)
That is how to copy, cut and paste on iPhone Xs, Xs Max and Xr. You can also paste a copied text Multiple times i. Different places. However, once you copy a new text the old one gets overwritten. Also, once you restart your device, any copied text gets wiped away so be sure to paste it somewhere else before you copy another text or restart
How to Copy-Paste Text from iPhone to Mac or Windows PC and
Can't figure out how to give songs star ratings anymore in your iPhone's Music app? That's because Apple removed the ability to do so from the new iOS 10 update, just as I expected they would. It's still possible to rate songs, it's just very irritating. The star rating system has been slowly making
I Downloaded Albums and They Dont Show in My Music Player on
Nexus phones are all allowed to be unlocked, and many phones from Motorolar and HTC as well as some other phones allow users to unlock through a similar process. However, some device can never unlock its bootloader. If an user who want to root their Android device or flash a new custom ROM, he/she had to unlock the bootloader.
How to Unlock Bootloader Using Fastboot on Android
0 comments:
Post a Comment