How To: Create a Bootable Install USB Drive of Mac OS X 10.9 Mavericks
Apple may have made Mavericks more accessible to Mac users everywhere at the fair price of zero dollars, but unfortunately, they made it trickier to create a bootable install drive of the Mac OS X 10.9 operating system.Don't Miss: How to Create a Bootable Install Drive of 10.11 El Capitan Don't Miss: How to Create a Bootable Install Drive of 10.10 Yosemite There hasn't been any physical installation DVDs available for Mac operating systems since Snow Leopard (10.6), with Lion (10.7) and Mountain Lion (10.8) both available via the Mac App Store as downloads only.So, if you wanted a backup install disc in case something went wrong, or in case you wanted to install Mac OS X on your computer without signing into the Mac App Store, you'd have to create a bootable DVD or USB drive yourself using the InstallESD.dmg, which was an easy process using Disk Utility.Unfortunately, that Disk Utility method does not work for the newest Mac OS X 10.9 (Mavericks) that was released as a free download on Tuesday. Technically, you can still use Disk Utility to make a bootable USB drive, but the process is more complicated than it's worth.There are a couple alternatives, though, and they're both fairly easy.
Method #1: Using TerminalSince we don't want to use Disk Utility anymore to make a bootable Mac OS X Mavericks install drive, we'll have to resort to the Terminal application on your Mac.
Step 1: Download Mavericks from the Mac App StoreBefore we get to the USB drive part, make sure you download Mavericks from the Mac App Store. If you've haven't installed Mavericks onto your computer yet, download it but don't run the installer. If you do, you'll have to download 5.3 GB file all over again, which can take a good amount of time.If you've already installed Mavericks, you will have to download the installer again, since it self-destructs after installation.After the download is complete, a file called Install OS X Mavericks should be in your Applications folder. Keep it there.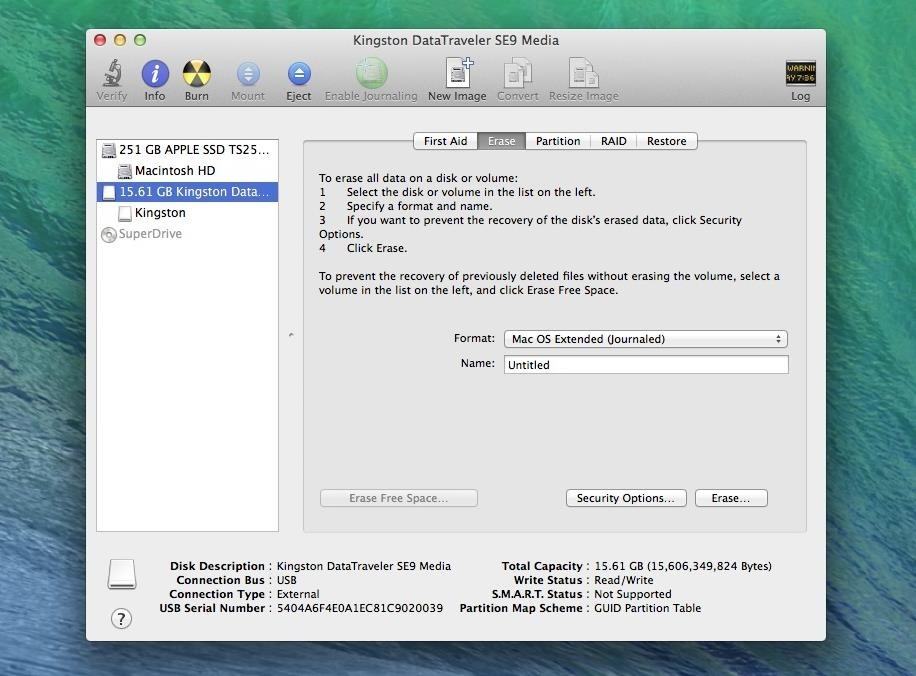
Step 2: Format Your USB Flash Drive with Disk UtilitySince the Mavericks install file is over 5 GB, you'll need an empty USB flash drive that's at least 8 GB in size, formatted as Mac OS Extended (Journaled). To make sure it's good to go, we'll just reformat it.Plug in your USB drive and open up Disk Utility. Though we don't want to use Disk Utility to make the bootable drive, we still need it to make sure the USB drive is formatted correctly.Select your flash drive from the left side in Disk Utility, then select the Erase tab. Make sure the format is Mac OS Extended (Journaled), keep the name as Untitled, and hit the Erase button. Note: You can change the name from "Untitled" to something else, just make sure you alter the path name in Step 3 to reflect this.Then hit the Erase button once more to repartition the drive.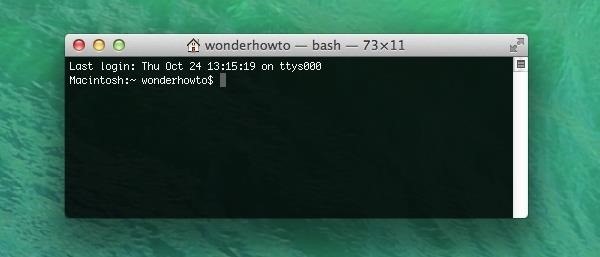
Step 3: Make the Bootable USB Drive with TerminalOnce you have Mavericks in your Applications folder and your USB flash drive has remounted, open up Terminal. You can find it via Spotlight Search, or in the Utilities folder in Applications. Once it's opened, go ahead and copy/paste the following command into your Terminal window (or type it out if you want).sudo /Applications/Install\ OS\ X\ Mavericks.app/Contents/Resources/createinstallmedia --volume /Volumes/Untitled --applicationpath /Applications/Install\ OS\ X\ Mavericks.app --nointeraction Then, hit Enter. It will ask you to type in your administrator password. Do so and hit Enter again. Note: If you don't have an administrator password set up on your Mac, you will not be able to proceed. You need to set up a password first, since this command requires root privileges.Terminal will now erase your drive again and start copying the files over to your USB flash drive. Some have said this method should only take about 20 minutes, but It took me a little over an hour to make mine. Once it's finished (it should say "Copy complete" and "Done"), you'll have a bootable USB drive of Mac OS X 10.9 Mavericks. If for some reason it looks like it's stuck on Copying installer files to disk..., you might want to try again. I had to do this, and it worked fine the second time. If that doesn't work, try another USB drive. Alternatively, you can use the next method.
Method #2: Using DiskMaker XIf you're not comfortable using Terminal on your Mac, DiskMaker X is for you. This app has actually been around since Lion and Mountain Lion, and was previously called Lion DiskMaker, but it's recently been updated to work with Mavericks. It's free to download and use, but you can donate to the devs if you want.
Step 1: Download & Install DiskMaker XJust download DiskMaker X 3 and install it to your Applications folder. Also, make sure you already have the Install OS X Mavericks file there, too, and a properly formatted USB drive before continuing.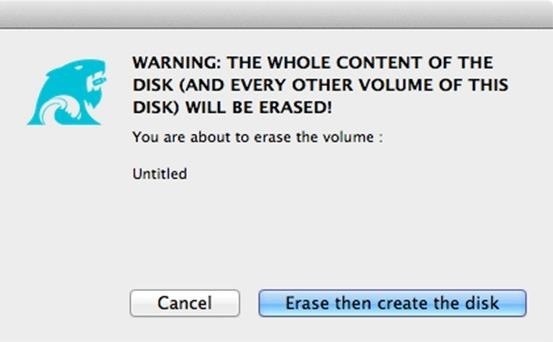
Step 2: Run Through the Easy InstructionsNow open up DiskMaker X and choose Mavericks (10.9). It will find the installer file in your Applications folder. Select Use this copy, choose the USB thumb drive option (if that's what you're using), select the partition you want to erase (e.g. Untitled), and hit Erase then create the disk. Then, enter your admin password and wait. Once it's done, you should see a notice saying your OS X boot disk is ready. Image via arstechnica.net
Using Your New Bootable USB DriveTo use your bootable Mavericks USB drive, simply plug in the drive to your Mac of choice and restart (or turn on) the computer while holding down the Option (Alt) key on your keyboard. When the gray screen comes up, select "Install OS X Mavericks."From there, you can choose to upgrade your current OS to Mavericks, or you can perform a clean install by erasing your main hard drive in Disk Utility, and then choosing "Install a new copy of OS X" instead.
USB drive and hand image via Shutterstock
After converting the USB flash drive from MBR to GPT format, you can use the steps below to create a bootable USB installation media to install Mac OS X. Creating USB install media. To create a bootable media to install Mac OS X, use these steps: Download and install a copy of TransMac, which is the software that will make everything happen
How to create a bootable macOS Sierra installer drive
How to create a bootable installer for macOS. and MyVolume is the name of the USB flash drive or other volume you're using. Select Install macOS (or Install
How to make a bootable Mavericks install drive | Macworld
Though you can install Mavericks (OS X 10.9) directly from your Mac's hard drive, a bootable installer drive can be more convenient for installing the OS onto multiple Macs. And if your Mac is
How to create a bootable USB to install OS X Mavericks
In April, I wrote an article on TechRepublic about how to create a bootable USB to install OS X. The latest iteration of OS X, version 10.9 (aka Mavericks), marks not only 200+ changes in the OS
Make a Bootable Flash Installer of OS X or macOS - Lifewire
It's not really that much of a secret, but ever since OS X Mavericks, the Mac OS installers have contained a command hidden inside the installer package that takes what used to be a complex process for creating a bootable copy of the installer, and turns it into a single command you enter into Terminal.
How to Create a Bootable Install USB Drive of Mac OS X 10.9
Apple released the new Mac OS X 10.10 Yosemite in the Mac App Store for everyone to download and install for free on October 16th, 2014, but downloading a 5+ GB file for each of your computers will take some serious time.
How to Make a Bootable OS X Mavericks USB Install Drive
osxdaily.com/2013/06/12/make-boot-os-x-mavericks-usb-install-drive/
Just like other recent major Mac updates, OS X Mavericks arrives as an app that wants to update the current OS X installation, and with a little work you can make a bootable USB installation drive. This allows you to easily perform partitioning for dual boot situations, clean installs, upgrades on
How to quickly make a Mac OS X bootable USB on Windows
Apple may have made Mavericks more accessible to Mac users everywhere at the fair price of zero dollars, but unfortunately, they made it trickier to create a bootable install drive of the Mac OS X 10.9 operating system.
3 Ways to Create a Bootable Install USB Drive for macOS or OS X
To install macOS or OS X from USB, you need to create a bootable install USB drive for Mac operating system. This tutorial will introduce you three ways to create bootable USB drive for macOS High Sierra, macOS Sierra, Mac OS X El Capitan, Yosemite, Mavericks and more.
How to Create a Bootable Install USB Drive of Mac OS X 10.10
How to create a bootable installer for macOS - Apple Support
I was able to make a macOS Sierra external USB boot disk in a few minutes, and the installation worked without a hitch. Also works with older versions of OS X. Diskmaker X is a popular app.
0 comments:
Post a Comment