How To: Install Android Q Beta on Your Essential Phone
Like last year's beta release of Android Pie, Google has allowed the Android Q Developer Previews to support some non-Pixel devices. Announced at Google I/O 2019, there are 15 non-Pixel smartphones eligible for the Android 10 Beta, including 2017's Essential PH-1.With a few steps, you can enjoy the latest version of Android once again on your Essential Phone before it officially unveils in late-summer, early-fall. It comes as no surprise that Google includes Essential in the Android Q Beta. Not only is Essential run by Android co-founder Audy Rubin, but Essential Phone is one of the few devices to run stock Android.While Essential does include instructions on its website for installing the Android Q Beta, I ran into some issues, and there's a good chance you will too. Therefore, after some trial and error, I've laid out the three easiest ways to install the beta below, including the over-the-air update, manually without a custom recovery, and manually with a custom recovery.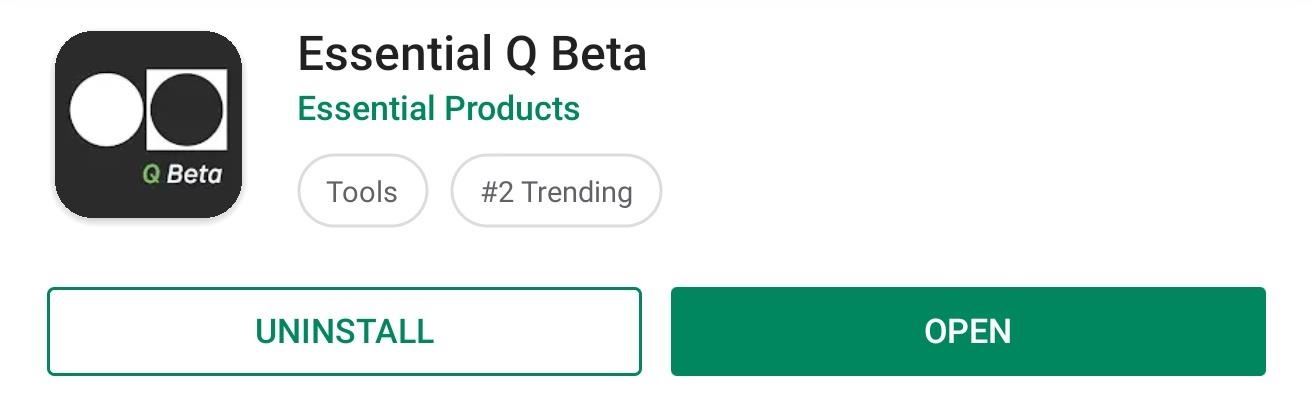
Option 1: Over-the-Air (OTA)By far, the easiest method to get Android Q Beta on your Essential Phone is with the OTA update, which lets you install Android Q the same way you would any official software update pushed out by Essential. However, before you check "About Phone," you need to sign up for the beta first.It's a requirement to give access to only those that know it's unstable software and that data will be collected to uncover bugs and other issues that will help with the continued development of the stable release. To sign up, simply install the Essential Q Beta app from the Play Store.Play Store Link: Essential Q Beta (free) Once installed, open the app and select "Enable Phone Access" so that it can retrieve your device's serial number. Then, input the requested information, which includes your email address and first and last name. Once filled in, select the button at the bottom. The next page will state that once your information is confirmed, you will receive the update over the air. With a little bit of patience, you will get a notification for a new software update which you can select to download and install Android Q Beta on your Essential.
Option 2: Without a Custom RecoveryWith a custom recovery, this process is super easy to get Android Q Beta installed manually, nearly identical to updating a rooted phone with the latest security patch. However, since a lot of you are probably not running modified software, we'll first show the manual process if you're running unmodified software on Essential PH-1.
Step 1: Download ADB & Fastboot on Your PCTo install the Essential Q Beta manually, you'll need to use ADB commands. ADB commands are commands you send from a computer to your Android phone to perform tasks not available within the software. You'll also need Fastboot.While there are multiple ways to add these programs to your computer, we believe the best method is to install Google's official SDK Platform Tools. This method has proven to be the most reliable across different computers and devices.Instructions: How to Install ADB & Fastboot on Mac, Linux & Windows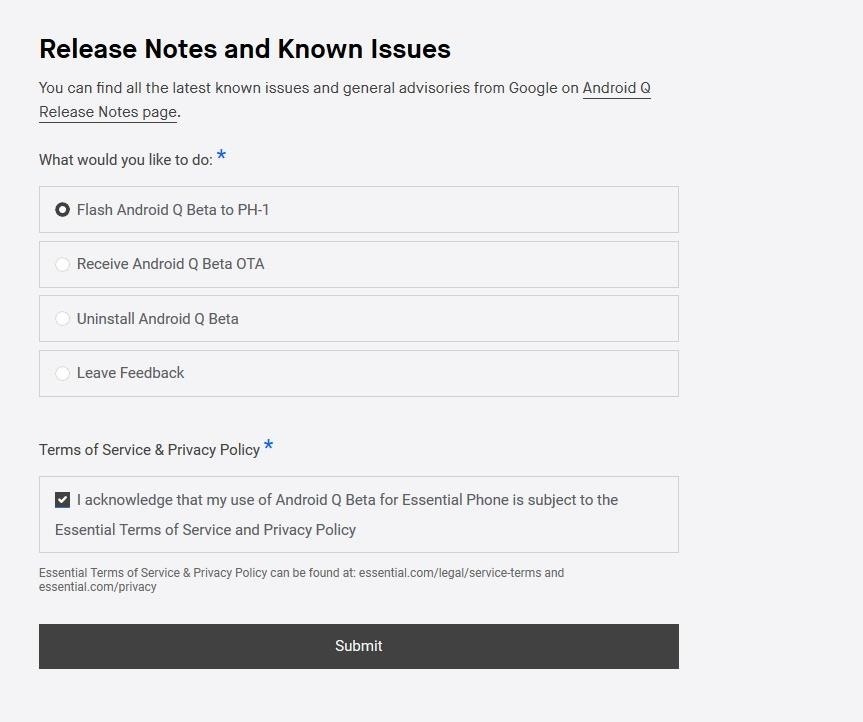
Step 2: Download the OTA FileOn your computer, visit Essential's Android Q Beta Program webpage. At the bottom of the page, you'll be presented with four options. Choose "Flash Android Q Beta to PH-1," and check the checkbox below acknowledging its usage. Select "Submit" to bring up a new page with links to for the files.Link: Essential's Android Q Beta Program On the next page, choose the version labeled "Download (OTA)." Once downloaded, move the ZIP file to the platform-tools folder inside of your ADB installation directory. For Windows users, you'll find this folder here: C:\Program Files (x86)\Android\android-sdk\platform-tools However, if you decided to use the minimal ADB installer, the folder will be in a different location. If you're unsure of the folder's location, or if you're on a Mac or Linux machine, use your computer's search function to find the platform-tools_ folder.After you've copied the ZIP file into the platform-tools folder, keep the window open, as you will need it for the next step.
Step 3: Open a Command Prompt or Terminal WindowOpen a Command Prompt or Terminal window. For Windows, press the Windows button on your keyboard, type in "cmd," and hit Enter. On a Mac or Linux computer, open it up from the folder with all your applications or via another way, such as Spotlight on a Mac or a shortcut in the dock.In the Command Prompt or Terminal window, input the following code, replacing "location" with the location of your platform-tools folder. On a Windows machine, you can copy the location from the address bar at the top of the File Manager window. Otherwise, on Windows, Mac, and Linux, you can just drag and drop the folder into the terminal after cd with a space after it. cd location The cd command will redirect the command prompt or terminal to that directory, allowing you to access its files. Only with this redirect can you start to use ADB and fastboot commands. No matter which operating system you are using, leave the Command Prompt or Terminal open, as you will need it for most of the steps below.
Step 4: Unlock the BootloaderThe next step is to unlock the bootloader of the Essential PH-1. We've already laid out this process in our guide on unlocking the Essential Phone's bootloader, so make sure to check that out. We include a lot of details, breaking down each step to avoid any issues. Also, be aware that this process will reset your phone, so make sure you back up all your data.Instructions: How to Unlock the Bootloader on the Essential PH-1 Starting with Android 9.0, your backup files are protected by the lock screen passcode. Therefore, make sure you can remember your old passcode, in case you switch it after restoring your phone.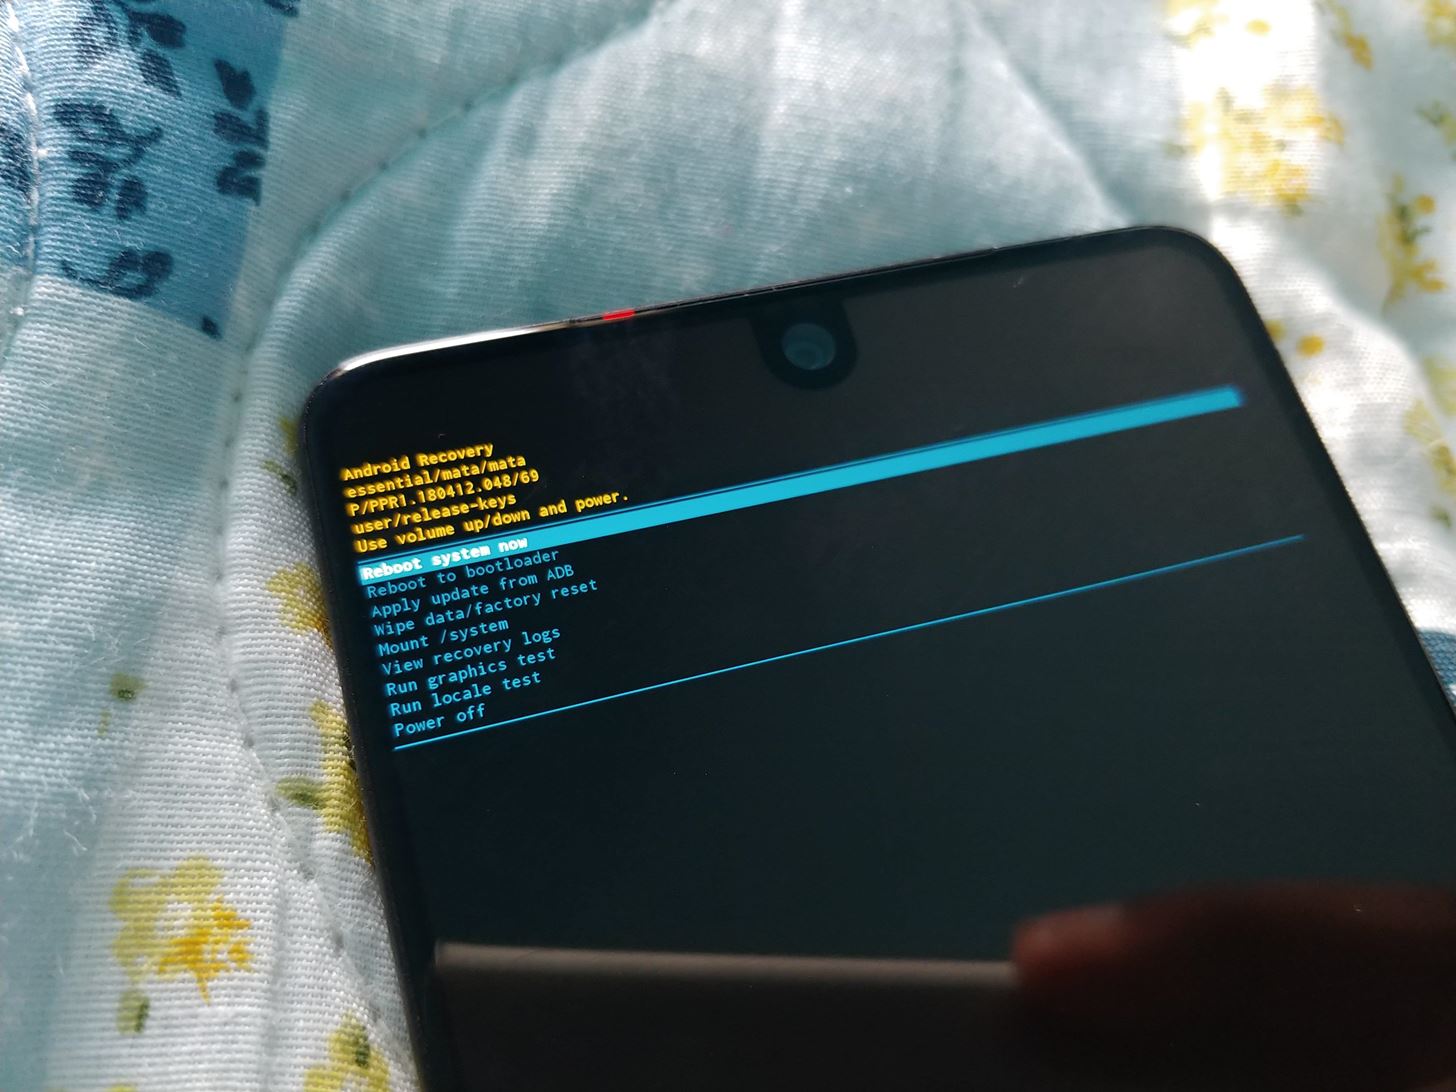
Step 5: Install the Android Q BetaOnce your phone reboots and brings you to the initial start screen, verify that ADB commands can still be sent by inputting the following command into Command Prompt on Windows. adb reboot recovery For Mac and Linux users, you 'll need to put ./ before the command. Therefore, it will look like this instead: ./adb reboot recovery You'll be presented with a new screen on the phone with Android's mascot lying down. Hold the Power button and tap Volume Up to see the recovery menu options. Using the Volume buttons to navigate, highlight "Apply update from ADB," and confirm by pressing the Power button. Image by Jon Knight/Gadget Hacks Two lines of text will appear confirming your device is ready to accept sideloaded firmware. Back on your computer, type the following in a Command Prompt and include a space at the end. Do not press enter yet. adb sideload On Mac and Linux, type the following into the Terminal, also including the space at the end. Do not press enter yet. ./adb sideload Drag-and-drop the OTA.zip file you downloaded in Step 2 into the Command Prompt or Terminal window. This will populate the full file name and location saving you time and potential issue for typing it wrong. Before pressing Enter, make sure the command looks like this for Windows: adb sideload filelocation OTA.zip Or like this for Mac and Linux: ./adb sideload filelocation OTA.zip A percentage number will show up in the Command Prompt or Terminal window. Once it reaches 100 percent, restart your phone and your phone will reboot with Android 10 Beta installed.
Option 3: With a Custom RecoveryThere is another way to update to Android Q Beta which is much easier than Method 2 above. However, it does require you to have a custom recovery. A custom recovery is modified recovery which gives you extra functionality over your Essential PH-1. Tools such as TWRP let you back up your phone entirely (not just the apps and app data), root your phone with tools such as Magisk, run custom ROMs, and sideload OTA updates.If you haven't already, you should consider installing TWRP. It will make future Android Q Beta updates easier to install and will let you make full copies of your phone to return to if something goes wrong. We have a detailed guide on adding TWRP to your Essential Phone, so make sure to check that out.Instructions: How To Install TWRP Recovery on the Essential PH-1
Step 1: Download the OTA FileWith that out of the way, you'll need to visit Essential's Android Q Beta Program webpage on your computer. At the bottom of the page, you'll be presented with four options. Choose "Flash Android Q Beta to PH-1," and check the checkbox below acknowledging its usage. Select "Submit" to bring up a new page with links to for the files.Link: Essential's Android Q Beta Program On the next page, choose the version labeled "Download (OTA)."
Step 2: Download the TWRP FileSince installing Android Q Beta will wipe the device, you'll also lose the TWRP you already have. So, I recommend downloading the TWRP zip file as well. You need this file to keep your custom recovery after flashing the update. If you don't want a custom recovery anymore, by all means, skip this.Download the TWRP ZIP file from TWRP
Step 3: Transfer the OTA & TWRP FilesOnce the files are downloaded, use a USB cable to connect your phone to your computer. Remember, the included cable with the Essential Phone is USB Type-C on both ends, so if your computer doesn't have USB-C input, you'll need to get a USB-C to USB-A cable.Now, transfer the OTA file and the TWRP file to the "Downloads" folder on the Essential Phone. If you need help on this part, let me know in the comments. It's pretty easy on Windows. On a Mac, you'll need the Android File Transfer tool.If you run to any trouble, you can also visit the links in Step 1 and Step 2 directly on your Essential PH-1 to download the files without the need of a computer.
Step 4: Boot into Your Custom RecoveryHold the Power button until the power menu appears, then choose "Reboot." When you select "Reboot," hold down the Volume Down button on the side of the phone. After a few seconds, your phone will reboot to the bootloader menu. Using the Volume buttons to navigate, move to "Recovery mode," and press the Power button to confirm. Your phone will then restart again, this time into TWRP. Input your passcode to access TWRP.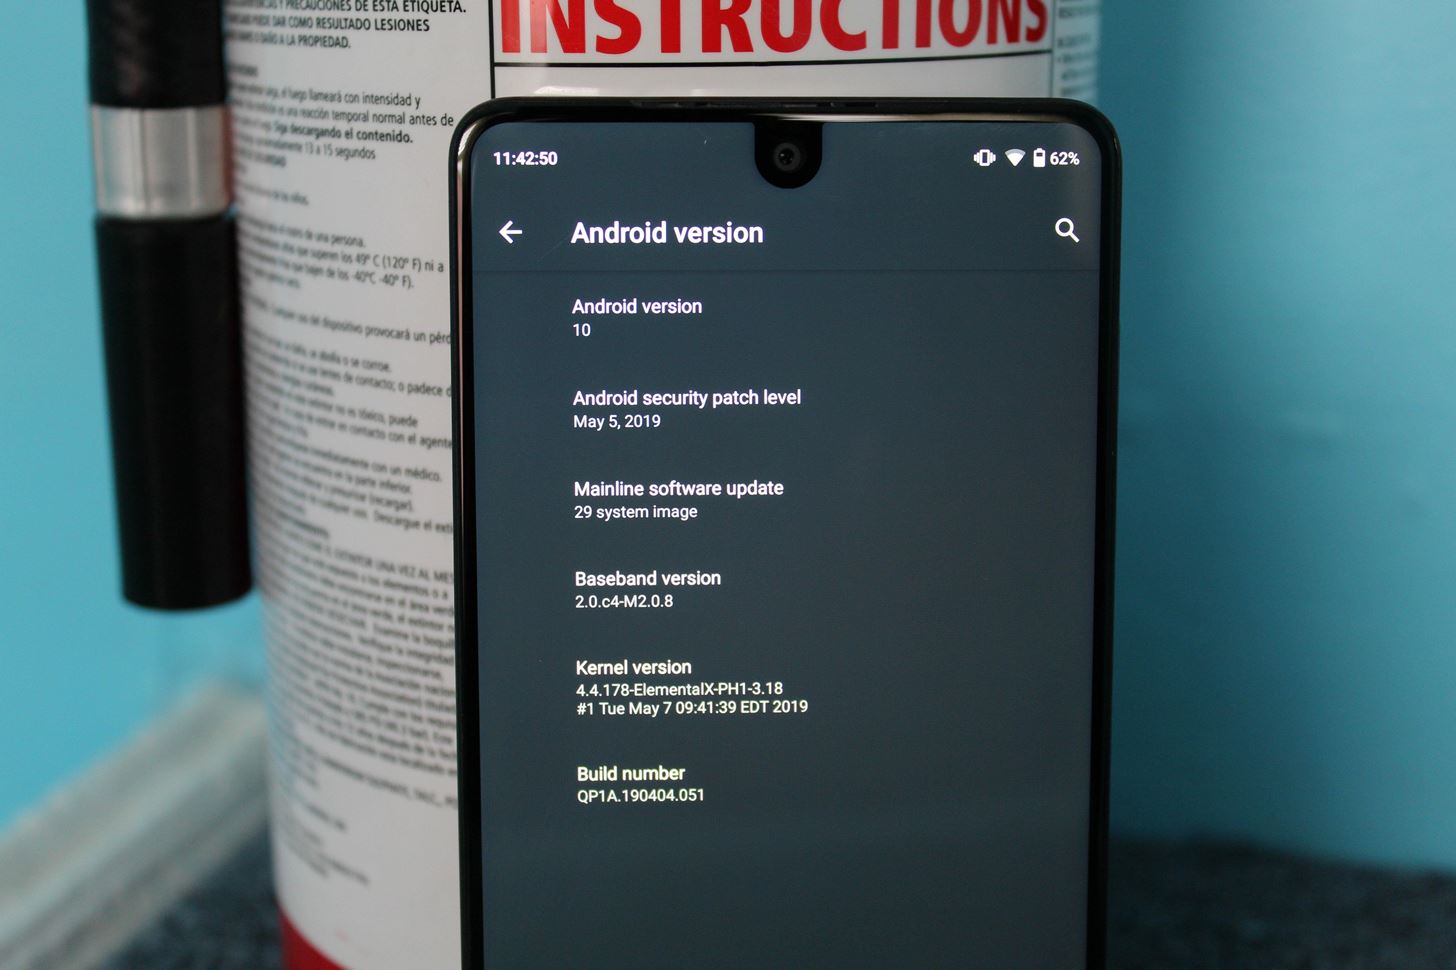
Step 5: Install the OTA FileFrom the TWRP menu, choose "Install." Find the OTA.zip file you place in the "Downloads" folder. Choose the file and swipe right on the bottom slider to install the ZIP file. Next, select the back button to return to the previous screen, then choose the TWRP installer ZIP file. Swipe right on the bottom slider to install this as well.Once both are installed, choose "Reboot System." Your phone will reboot, only this time, it will jump right into your newly installed Android Q system. Image by Jon Knight/Gadget Hacks From my testing, I found the latest Elemental X kernel works with Android Q. I also found that Magisk also works, meaning you don't have to give up root access as well. For how to add the custom kernel from Elemental X or Magisk, check out those links.Don't Miss: All the Cool New Features & Changes in Android Q 10Follow Gadget Hacks on Pinterest, Reddit, Twitter, YouTube, and Flipboard Sign up for Gadget Hacks' daily newsletter or weekly Android and iOS updates Follow WonderHowTo on Facebook, Twitter, Pinterest, and Flipboard
Cover image and screenshots by Jon Knight/Gadget Hacks
Do you fancy having an iOS app available directly on your non-jailbroken iPhone that creates a SOCS Proxy allowing you to connect your laptop to the Internet via your iPhone's data connection, making it possible for you to enable free Personal Hotspot tethering without having to use jailbreak
How to Use Your iPhone's Personal Hotspot to Tether a PC or Mac
Instagram Now Lets You Follow Hashtags in Your Main Feed Tuesday December 12, 2017 8:05 AM PST by Mitchel Broussard Instagram today announced that you can now follow any hashtag the same way you
Instagram's new hashtag feature can supercharge your feed
But a lot of what makes a good video is down to the person behind the camera. Today we'll share 16 simple tips for shooting better video on your Android device. How to take better photos with your
cinematography tips using oneplus - OnePlus Community
How to Download Free Videos in Mozilla Firefox with
Most apps in iOS support both portrait and landscape mode. The iPad even supports portrait and landscape on the home screen. Apple has limited the iPhone's home screen to portrait mode only, but there is now a jailbreak tweak for adding landscape rotation to your iPhone's home screen.
Change the Resolution & Enable Home Screen Landscape Mode
Omgå Candy Crush Saga's Waiting Period for at få nye liv og niveauer straks Der er en nem tid hack til rådighed for Candy Crush Saga, som giver dig mulighed for at omgå tidsbegrænsningerne, så du kan spille flere spil hurtigere, og denne videoguide fra KiboshGaming vil lede dig igennem den på både Android og iOS-enheder.
Out of the box, Chrome isn't as touch-friendly as Microsoft's Edge browser. However, you can tweak some hidden settings in Chrome for more touch support for your Windows tablet or touchscreen PC.
Make Google your homepage - Google
Unfortunately, these cloud playback features aren't available in the VLC app for Android, so this tutorial is geared specifically towards iOS users. But if you have an iPhone, iPad, or iPod Touch, it's really simple to set up, so I'll show you how to stream videos directly from your favorite cloud storage services in the VLC app.
7 Best Android music player apps that can stream from cloud
The Ascent is The Motley Fool's new personal finance brand devoted to helping you live a richer life. Here's What Apple Inc.'s 2018 iPhone Lineup Could Look Like (after this year's $999
Here's what Apple's foldable iPhone, dubbed iPhone X Fold
Now we all know that Apple isn't the best when it comes to customization, so what this app does is take the nice looks of the Control Center and ramps up the customization options to what Android
Get Better Quick Settings with a Fully Customizable Control
How To: Blend Your Android's Status & Nav Bars to Match Any App's Color Scheme How To: Remove the Navigation & Status Bars on Your Nexus 7 Tablet to Make the Screen Feel Bigger How To: Move the Obtrusive Volume Indicator Box to Your iPhone's Status Bar
How to Make the Volume Slider Less Annoying When Playing
0 comments:
Post a Comment