How To: Install the Android M Preview on Your Nexus Device (Using Mac or Linux)
Google I/O is like Christmas for Android enthusiasts. Every year, this conference showcases new and upcoming features for the world's leading mobile operating system, and this year's was no different. Shortly after announcing Android M, Google released a preview version of the upcoming firmware for Nexus devices.We've already covered a method to install this new preview build on Nexus devices, but that one required a Windows PC. For Mac and Linux users, the "Fastboot" method is the way to go, and I've got a step-by-step guide on this process waiting for you just after the jump.Don't Miss: How to Install the Android M Preview Using Windows
Before You BeginThis new preview build is only available for the Nexus 5, Nexus 6, Nexus 9, and Nexus Player. It doesn't require root to install, but you should be aware that you will lose root and all of your data if you install this build.The following guide is meant for Mac and Linux users, but it will also work on Windows computers. If you want an easier way for Windows, check out my guide on installing the Android M preview using the Nexus Root Toolkit.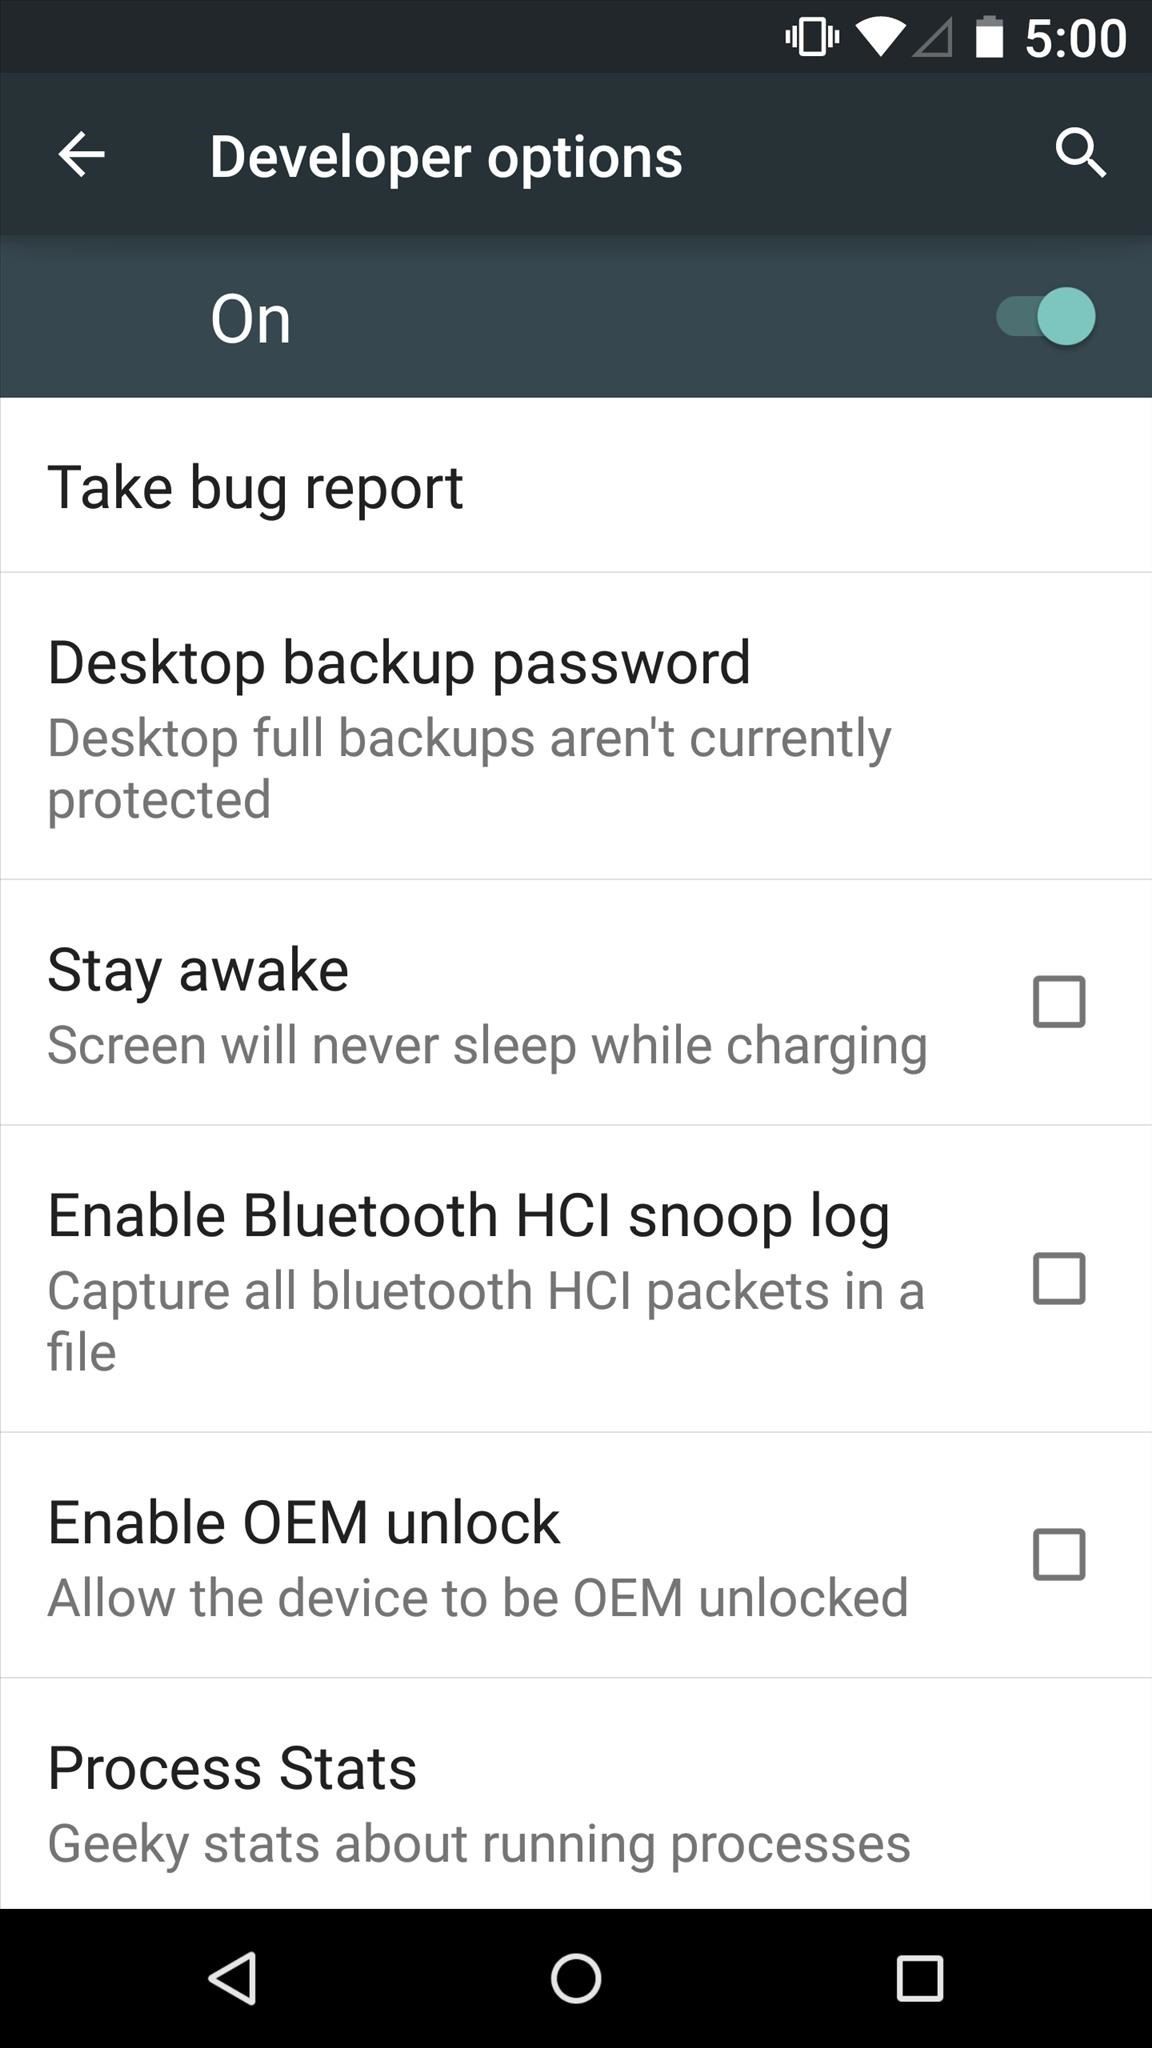
Step 1: Enable OEM Unlock (Nexus 6 Users Only)Nexus 6 users should first enable the "OEM unlock" option in the Developer options. (If you don't see this menu option in Settings, here is how you unlock it.) Simply tick the box next to "Enable OEM unlock" and you'll be ready to go.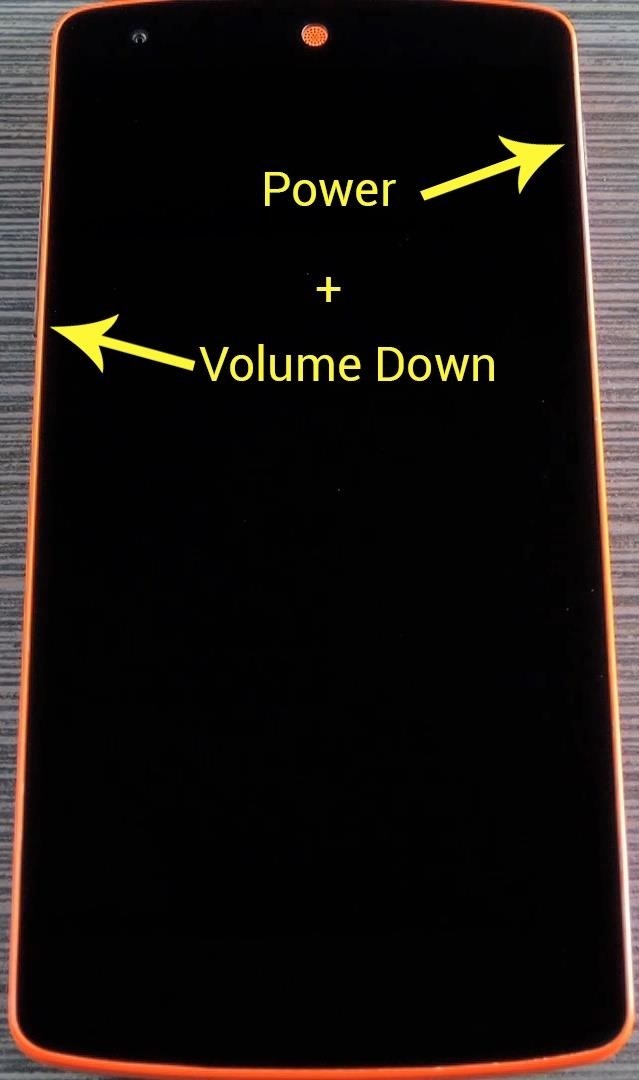
Step 2: Put Your Nexus in Bootloader ModeYou'll need to boot your device into Bootloader mode, so power your Nexus completely off. When the screen goes black, press and hold the volume down and power buttons simultaneously. Once the Bootloader menu comes up, go ahead and connect your phone to your computer with a USB data cable.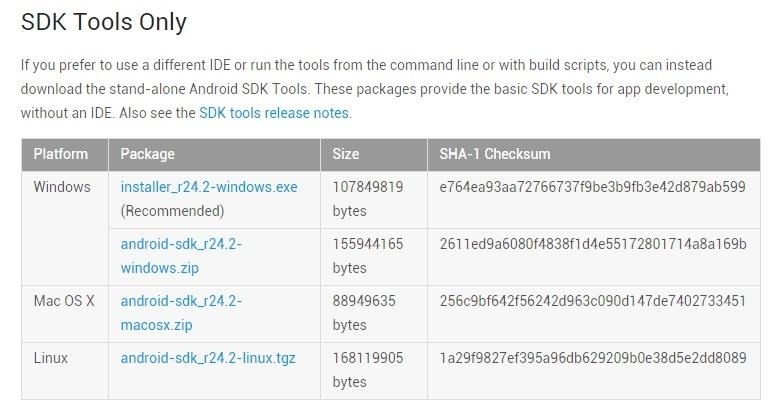
Step 3: Install the Android SDK on Your ComputerOver on your computer now, you'll need to grab a copy of the latest Android SDK. Head to the official site at this link to download the file for your particular operating system. The install process will vary depending on your operating system. Windows users can simply launch the EXE file to install the full Android SDK, which will be saved in the C:\Program Files (x86)\Android\ folder. Linux and Mac users will have to extract the contents of the ZIP to a folder that can be accessed easily. Take note of this folder's location, as you will need to copy some files here later. From here, if you're using a Linux or Mac machine, open a terminal window and change directories to the /android-sdk-linux/tools/ or /android-sdk-macosx/tools/ folder that you just extracted. Next up, type android sdk (Linux) or ./android sdk (Mac) to launch the SDK Manager. After that, you'll need to download the Platform Tools package if you're using a Linux or Mac computer. Select the "Android SDK Platform-tools" option, then click the install button to take care of that.
Step 4: Install ADB & Fastboot on Your ComputerNext up, for your computer to be able to fully interact with your Nexus, you'll have to make sure you have the ADB and Fastboot drivers installed on your system.
Windows Users:If you own a Windows PC, you can download the drivers at this link. Just run the file, then follow the prompts, and you'll be good to go.
Linux Users:If you're a Linux user, download and extract this ZIP file, then run the script with Terminal.
Mac Users:For Mac users, the process of installing the proper drivers is a bit more involved. Please see our guide on the topic for more information.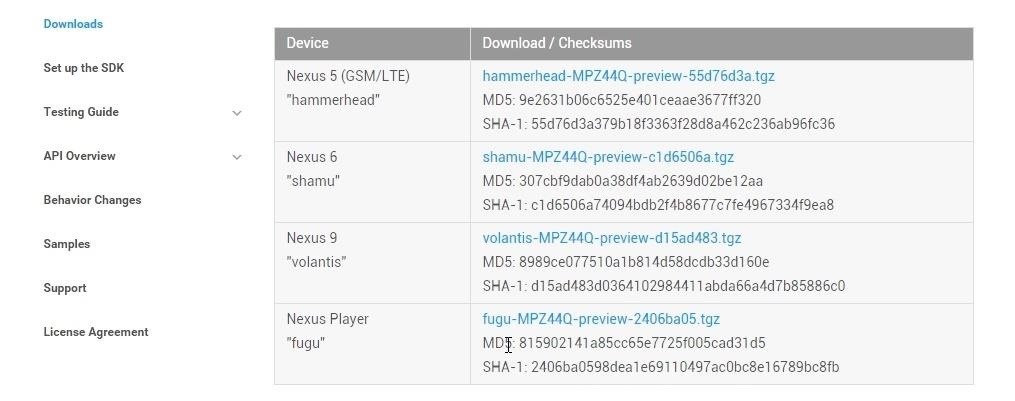
Step 5: Download the Android M Preview on Your ComputerWith the groundwork now laid, you're ready to download the new Android M factory images. Head to this link, then choose your device from the list to download the factory images.
Step 6: Move the Factory Images to the Platform Tools FolderThis factory image file is a set of nested archives, so extract the contents of the first archive, then you'll find another archive. Extract that one as well, then you'll find a folder. Head into this folder, then extract the contents of the ZIP file that you'll find inside. At this point, copy all of the remaining files in this folder. Next, head to the "android-sdk" folder, then the "platform-tools" folder inside of it. After that, paste all of the factory image files into this folder.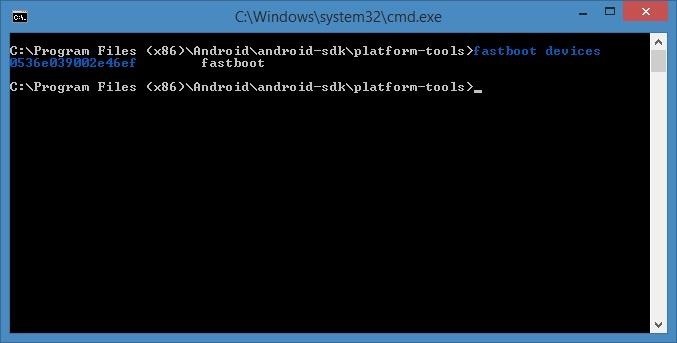
Step 7: Install the Android M Preview BuildAt this point, you're ready to install the Android M preview build. To begin, open a command prompt window, then change directories until you arrive at the "/android-sdk/platform-tools/" folder where you've pasted the factory images.Next, type fastboot devices and hit enter to verify that your Nexus is connected properly. Note that Mac users will have to add a "./" to the beginning of all Fastboot commands (e.g. ./fastboot devices). If it spits out a series of letters and numbers in response, you're good to go. If you haven't flashed factory images on your device before today, you'll have to unlock your Bootloader at this time. Type fastboot oem unlock and hit enter to take care of that. On your phone, press the volume up button to verify that you'd like to unlock your bootloader, then wait about a minute until the process has finished. Now you're finally ready to flash the Android M preview build. Type flash-all and hit enter, then the process should start automatically.
Step 8: Wait for a Reboot & Enjoy Android MIt will take 5 or 10 minutes to complete, but when it's done, your phone will automatically reboot. If it doesn't, you can type fastboot reboot to do so manually. At this point, it's safe to disconnect the USB cable and try out Android M. Some of the key features with this new release include automatic app backup, a granular permission control interface, as well as a new mobile payments system.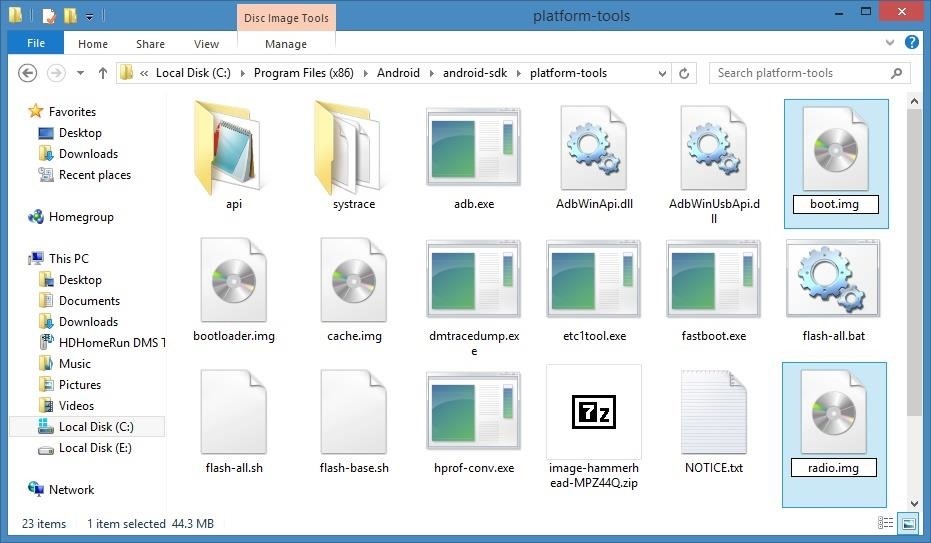
Step 9: TroubleshootingIf the flash-all script is not working on your computer, you'll have to install the images manually. To make things a bit easier, head to the "platform-tools" folder where you've stored the factory images. From here, rename the "boot-xxxx-xxx.img" file to "boot.img" instead. After that, rename the "radiio-xxxx-xxx.img" file to "radio.img" in the same manner. Next, open a terminal window and change directories to the "platform-tools" folder. From here, type fastboot flash bootloader bootloader.img and hit enter. Follow that up by typing fastboot reboot-bootloader to run the rest of these commands with the newer bootloader version. When that process has finished, type fastboot flash radio radio.img and hit enter. After that's done, enter fastboot flash boot boot.img to install the new kernel. Then, to install the new recovery image on your device, type fastboot flash recovery recovery.img and hit enter. Finally, you can flash the system image, which makes up the core of Android. Type fastboot flash system system.img and hit enter. This one will take as much as 5 minutes to install, so wait until the process has finished before moving on. When that's finished, use the volume buttons on your Nexus to highlight the "Start" option in the bootloader menu, then press the power button to boot your phone. Within a few minutes, Android M should greet you with its new lock screen. If you experience any minor bugs or quirks after using the manual install method, a quick factory reset should iron out all issues.Follow Android Hacks over on Facebook and Twitter, or Gadget Hacks over on Facebook, Google+, and Twitter, for more Android tips.
Samsung unveils Gear S smartwatch. It doesn't need to pair with a phone, and it eschews Android Wear. With a release date sometime in October, it's one of several devices to be shown off in Germany, at next week's IFA.
Samsung's Gear S smartwatch is just too big | Computerworld
Is there some way I can script/automate the following commands so that all I have to do is (in windows terminology) "run a batch file" to do all this? Here are my steps, in order: launch putty, choose hostname & port, click Open (would love to script/automate this 1st part too) linux shell/terminal opens; I enter my login and pwd
Termux - Run Linux On Android Devices, No Rooting Required!
While a locked bootloader usually means no custom ROMs, Safestrap Recovery bypasses the locked bootloader and installs a custom recovery on your AT&T or Verizon Note 3.
Install Safestrap Recovery & Custom ROMs on Your Bootloader
Our Samsung Galaxy S8 vs LG G6 comparison review stacks up the biggest flagship phones of 2017, comparing the S8 and G6's camera tech, specs, speed and more. Samsung's Galaxy S8 flagship phone
Compare LG V40 vs Samsung Galaxy S10: Price, Specs, Review
I used it in a rural area, checked for other freqs with my frequency spectrum analyzer to make sure I didn't "step" on anyone or get in trouble. I would love to be able to patent it and have a legal way to build and test it, but like many other inventions of mine, it will go in my bunker on the shelves to be covered with dust.
Bygg och använd en handhållen automatiserad warspying-enhet
How to Set up a Personal Web Server with XAMPP. There are a number of Personal Web Server applications available on the Internet. XAMPP is one of the most robust, and compatible as far as offering a cross platform (multiple operating
XAMPP Tutorial: How to Use XAMPP to Run Your Own Web Server
Google Pixel and Pixel XL phone problems: All you the fixes, hacks, workarounds and tricks you need to overcome some of the Google Pixel phone's biggest problems, bugs, and annoyances.
Google Pixel 3a review: the mid-range phone that can replace
Clean Slate (formerly contract buyout) offer: Clean Slate: Amount based on ETF (early termination fee) charged or remaining phone balance. Req. port from other carrier to Sprint, remain active & in good standing for 30 days before card issuance & buyback of working phone in good condition (the device is unlocked, powers on and there are no
Subscribe for more:
Security researchers have found that 95% of Android devices running version 2.2 to 5.1 of operating system, which includes Lollipop and KitKat, are vulnerable to a security bug, affecting more than 950 Million Android smartphones and tablets.
15 Best Free Hacking Apps For Android [2019 Edition APKs]
Play the Dinosaur Game Hidden inside your Google Chrome Written by Amit Agarwal on Oct 26, 2015 Google Chrome users are probably familiar with the T-Rex dinosaur that shows up when your computer is not connected to the Internet.
There's a Cute Cat Game Hidden in Android Nougat's Quick
For a Document (Word-like) in Google Docs, I want to be able to change the font size, family and spacings for the built-in in styles. How can I do that?
How to Customize Google docs Forms | Custom CSS Styling
I haven't been hit with any ads on my machine, but it's probably due to the fact that I log in locally, not with a Microsoft account. Windows 10 has you log in via a Microsoft account by default (you can change that if you want), and there are a couple easy steps for you to take to get rid of any future lock screen ads if you'd like to continue logging in with your Microsoft account.
How to Enable or Disable Wallet app on Lock Screen iPhone:iOS
How to Get the Classic Volume Controls Back in Windows 10
0 comments:
Post a Comment