How To: Get Your HTC One M7 Ready for a Different Mobile Carrier
Whether it's spotty data coverage, bad customer service, or a high monthly bill, at some point many of us consider changing carriers. The problem is, we often don't want or need to change our devices. Since it's now legal to unlock devices to bring to new carriers, getting devices switched over is doable, but it's pain going into carrier stores and dealing with their constant upselling.When you're finally fed up with your mobile provider and ready to switch to a new one, do it yourself. Keep your existing device and install the latest software from your new carrier in just a few simple steps. You'll be able to use their built-in apps as well as receive automatic software updates, just like you would if you purchased your HTC One directly from them. Please enable JavaScript to watch this video.
Understanding the Necessary StepsUsing downloadable RUUs with an S-Off device, we can easily change firmwares to switch from one carrier to another, as long as they are both GSM/LTE (sorry Sprint and Verizon Wireless users). The first steps will be to change your CID and MID, then install a new firmware.A CID, or Carrier ID, is the line of code that tells your device which mobile provider it is tied to. By changing an AT&T CID to a T-Mobile one, you can to install a T-Mobile ROM. The same goes for the MID, or Model ID.RUU stands for ROM Update Utility, and is what allows us to install a carrier's stock Radio, Recovery, and Firmware onto our One. Finally, to install a T-Mobile ROM, we will be using a T-Mobile RUU.In this guide, I will be showing you how to change your One's CID/MID and flash a RUU from a different carrier. There will be an optional step for relocking your bootloader, but only if you want to install OTA's directly from your new carrier.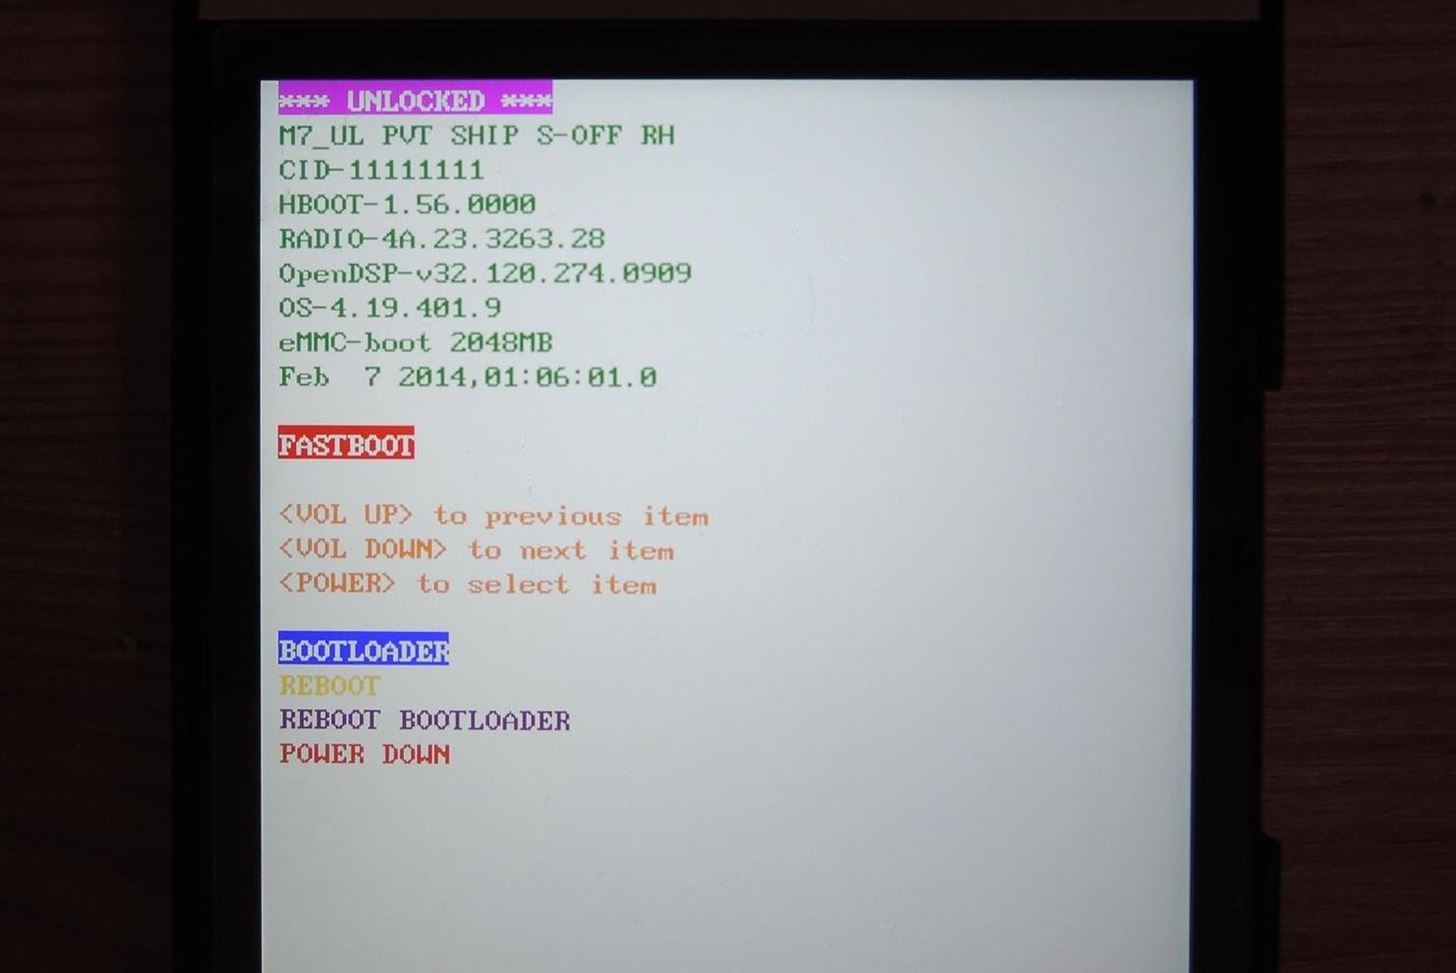
Getting Your HTC One & PC ReadyBe sure to get a few basics out of the way before getting started with the process:Install ADB and Fastboot on your computer. Enable USB debugging on your One. S-Off your device—this is a must. Since we will be using TWRP, your bootloader must be unlocked. Finally, double check that your device is a GSM/LTE compatible variant (this method will not work for Sprint or Verizon) and back up your apps and data.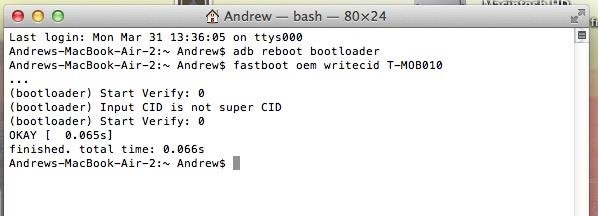
Step 1: Change Your CIDThe first and most important step is to change your CID to match the carrier you are switching to. Since I am going from AT&T to T-Mobile, I will be using T-MOB010. If you are unsure what CID to use, here is a great reference list from XDA member MrKongeniality.Connect your device to your computer and reboot into bootloader by typing the adb reboot bootloader command into terminal prompt. Then, change your CID with the fastboot oem writecid T-MOB010 command (change "T-MOB010" to your new carrier's CID). Reboot your device with fastboot reboot.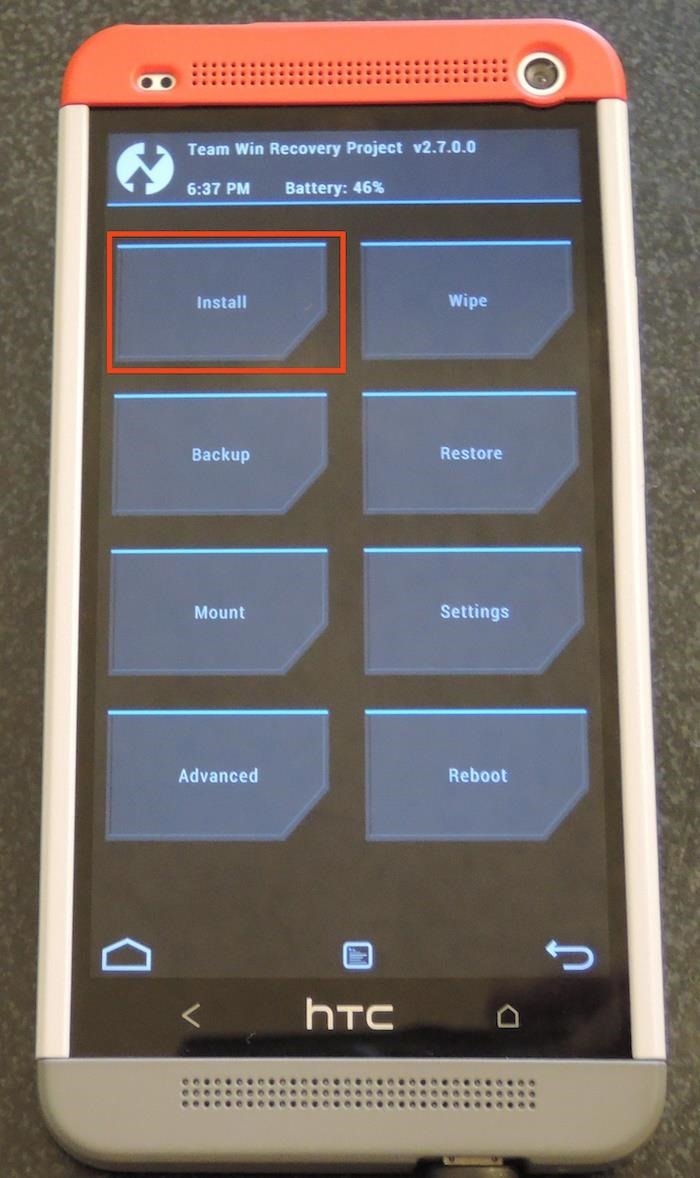
Step 2: Change Your MIDUsually, this step would require flashing a custom "Engineering" bootloader onto your phone, but thanks to XDA member Golv, there is now a simple tool that can be flashed in TWRP, or any other custom recovery.Download the MID Change Tool directly onto your One. Reboot your phone into recovery mode by plugging into your computer and typing the adb reboot recovery command. From TWRP, tap "Install" and select the MID_Change_1.01.zip you downloaded. Swipe to confirm flash and then let the AROMA installer startup. Agree to the terms in the AROMA Installer and select the MID you are planning to switch to. Since I am going to T-Mobile, I will be selecting the "PN0713000" Model ID. Press "Next" and let the installer do its work. If the install process stops at 0%, hold the Power button for about ten seconds, or until the phone reboots, and repeat the process. This a known issue with the MID tool. Once the install finishes, hit "Done", then "Reboot System" from TWRP.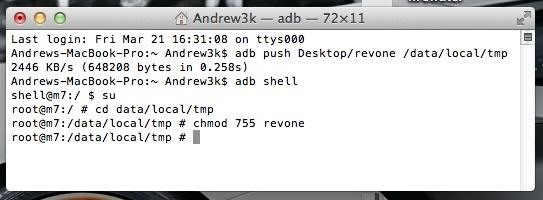
Step 3: Relock Your Bootloader (Optional)This step is only necessary if you want to install official OTA updates from your new carrier. Just remember that like unlocking the bootloader, relocking it will restore your device to a like-new condition, at least software-wise, and you will lose all of your data.Download the Revone tool and place it on your PC's Desktop. This tool will allow you to relock your bootloader without having that unappealing "RELOCKED" banner. Push Revone onto your One with the adb push Desktop/revone /data/local/tmp command (change "Desktop/revone" to the location where you saved Revone). Prepare Revone to run on your One with the following four commands separately and in order: adb shell, su, cd /data/local/tmp, and chmod 755 revone. Lock your bootloader and exit the adb shell with ./revone -l. Reboot your One to bootloader mode with adb reboot bootloader.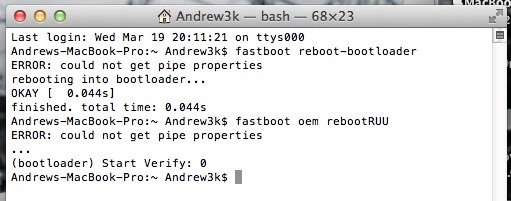
Step 4: Install Your New Carrier RUUSince you already know your new carrier's CID, you can use HTC1Guru's extensive RUU.zip collection to find the right one for you.If you didn't relock your bootloader, you will need to put your device back into fastboot mode with adb reboot bootloader. Rename the RUU file to "RUU.zip" and place it on you Desktop. Place your device into RUU Mode so that we can begin the RUU.zip flash. Use the fastboot oem rebootRUU command. You'll know you did it right once you see a silver HTC Logo on your One. Push the RUU to your device with fastboot flash zip Desktop/RUU.zip. Install the RUU by using the same command: fastboot flash zip Desktop/RUU.zip. After a few seconds, a green progress bar will appear under the HTC logo. Once the flash has completed, you will get a "Successful" message in your terminal window. Erase your cache to prevent boot-loops with fastboot erase cache. Then reboot your One with fastboot reboot.
All Set! Your HTC One Is Now Carrier SwitchedOnce your device boots back up, you will be the proud owner of re-branded HTC One and will to go through the process of setting your device up as if it were new, after which you can restore your data and check for your new carrier's latest OTA (Settings -> About -> Software Update). Be sure to leave a comment if you are having any issues or just to let us know how your experience went!
Here's how to delete or deactivate your Facebook account, or delete a group or page you've created. If you're sure you're ready to leave the world's most popular social media network, it's a simple process.
How to Unfriend on Facebook: 9 Steps (with Pictures) - wikiHow
Re-installing the stock firmware will wipe the root kernel and unroot your Samsung Galaxy S3. Prerequisites before you unroot T-Mobile Galaxy S3 and restore back to Stock firmware: Ensure that
How to unroot and reset to stock | Samsung Galaxy Tab S
In this tutorial, I'll be showing you how to download Chromecast's beautiful "idle screen" images to your Android device. With the app "Chromecast Wallpapers", you can browse hundreds of these
Set Chromecast Wallpaper - WallpaperSafari
How To: Send & Receive Text Messages from Your Nexus 7 by Wirelessly Syncing SMS with Your Phone How To: Use Gmail's New Confidential Mode to Send Private, Self-Destructing Emails from Your Phone How To: Turn Gmail into an Instant Messenger for Faster Emailing on Your iPhone
Remotely View & Send Text Messages from Your Android Phone
Go to your profile and tap your profile picture or video. Tap Take New Profile Video to take a new profile video or tap Select Profile Picture or Video to choose a video from your phone. Tap Edit to edit your video. Tap Trim to make your video shorter, tap Sound to choose if the sound is on or off or tap Cover to choose a thumbnail for your video.
How to Set a Looping Video as Your Facebook Profile Picture
After six months with Google's Project Fi, I'd switch to it if I could about your data use, Google will actually refund you the money for any unused data. that while I did save money on Fi
Prepare to transfer your number to Google Fi - Google Fi Help
Check out my 'secret' classic v
Guard Dog Burglar Alarm | KipkayVideos
kipkay.com/video/guard-dog-burglar-alarm/
Turn your doorbell into a vicious guard dog burglar alarm! Get the parts to make your own on Check out my 'secret' classic videos:
Doorbell « Wonder How To
Admittedly, Apple doesn't allow you to change font style on iPhone/iPad; you can change the font size of your smartphone. You can simply do the following: Step 1. On iOS 11 or later, go to Settings > Display and Brightness > Text Size and adjust the slider to increase or decrease the font size.
How To Change Font On Your iPhone - iPad - iPod Touch 2016
How to Make Your Own Ringtones for Verizon Phones. Don't want to spend a buck on a ringtone? Want to chose which part of the song you want? Well this article will tell you how to make a free ringtone on a Verizon phone.
Arduino sketch:
Freshen up the wallpapers in use on your Android smartphone or tablet by rotating the images on a regular schedule — here's how to do it, and the best apps for the job.
How to Turn Your Favorite Photo Into Wallpaper: 9 Steps
How To: Save Snapchats on Android Without Being Detected (No Root Required) How To: Automatically Save Snapchats onto Your Samsung Galaxy Note 2 How To: Secretly Save Snapchat Photos on Your Samsung Galaxy Note 2 Without Notifying the Sender
How to Save Snapchats in Samsung Galaxy Note 2
Okay, so you got lured into the idea of hacking a Facebook account?INDY/LIFE Newsletter. This Retro-Styled Game Lets You Shoot Projectiles from One Device to Another; Is There Any Easy Way to Spy a Person Another way for learning how to hack. Do you want to live a good life thought its
You Can Play the New Westworld Mobile Game on Your iPhone
This is why an app called Smart Launcher has been gaining popularity lately with over 10 million installs—it has an app drawer that analyzes your apps and usage data to automatically group apps into well-organized tabs. But now, the Smart Launcher developers have broken their futuristic app drawer out as a standalone product.
How to Add Smart Drawer and Get Automatic Sorting Feature On
0 comments:
Post a Comment